How to fully utilize your NAS: Build Audiobookshelf to achieve an all-in-one reading and listening experience

Want to achieve an all-in-one family reading experience?This article teaches you in detail how to deploy an AudioBookshelf server on NAS to manage unlimited eBooks, audiobooks and podcasts, sync progress, listen and read across devices, an ultimate experience, step-by-step teaching, easy to understand!
Introduction
Want to achieve an all-in-one family reading experience?This article teaches you in detail how to deploy an AudioBookshelf server on NAS to manage unlimited eBooks, audiobooks and podcasts, sync progress, listen and read across devices, an ultimate experience, step-by-step teaching, easy to understand!
In this era of 3-minute videos considered long, in order to avoid information overload and maintain inner peace, audiobooks and podcasts have become important channels for me to obtain knowledge and entertainment.
I often like to listen to audiobooks or podcasts during my commute, exercise, and even while preparing dinner.
Today’s protagonist is not only a powerful private audiobook and podcast system, but it can also take on all of your reading tasks.
Today I’ll teach you how to centralize all your audiobooks and podcasts in one place, and be able to listen to them anytime on any device, for free.
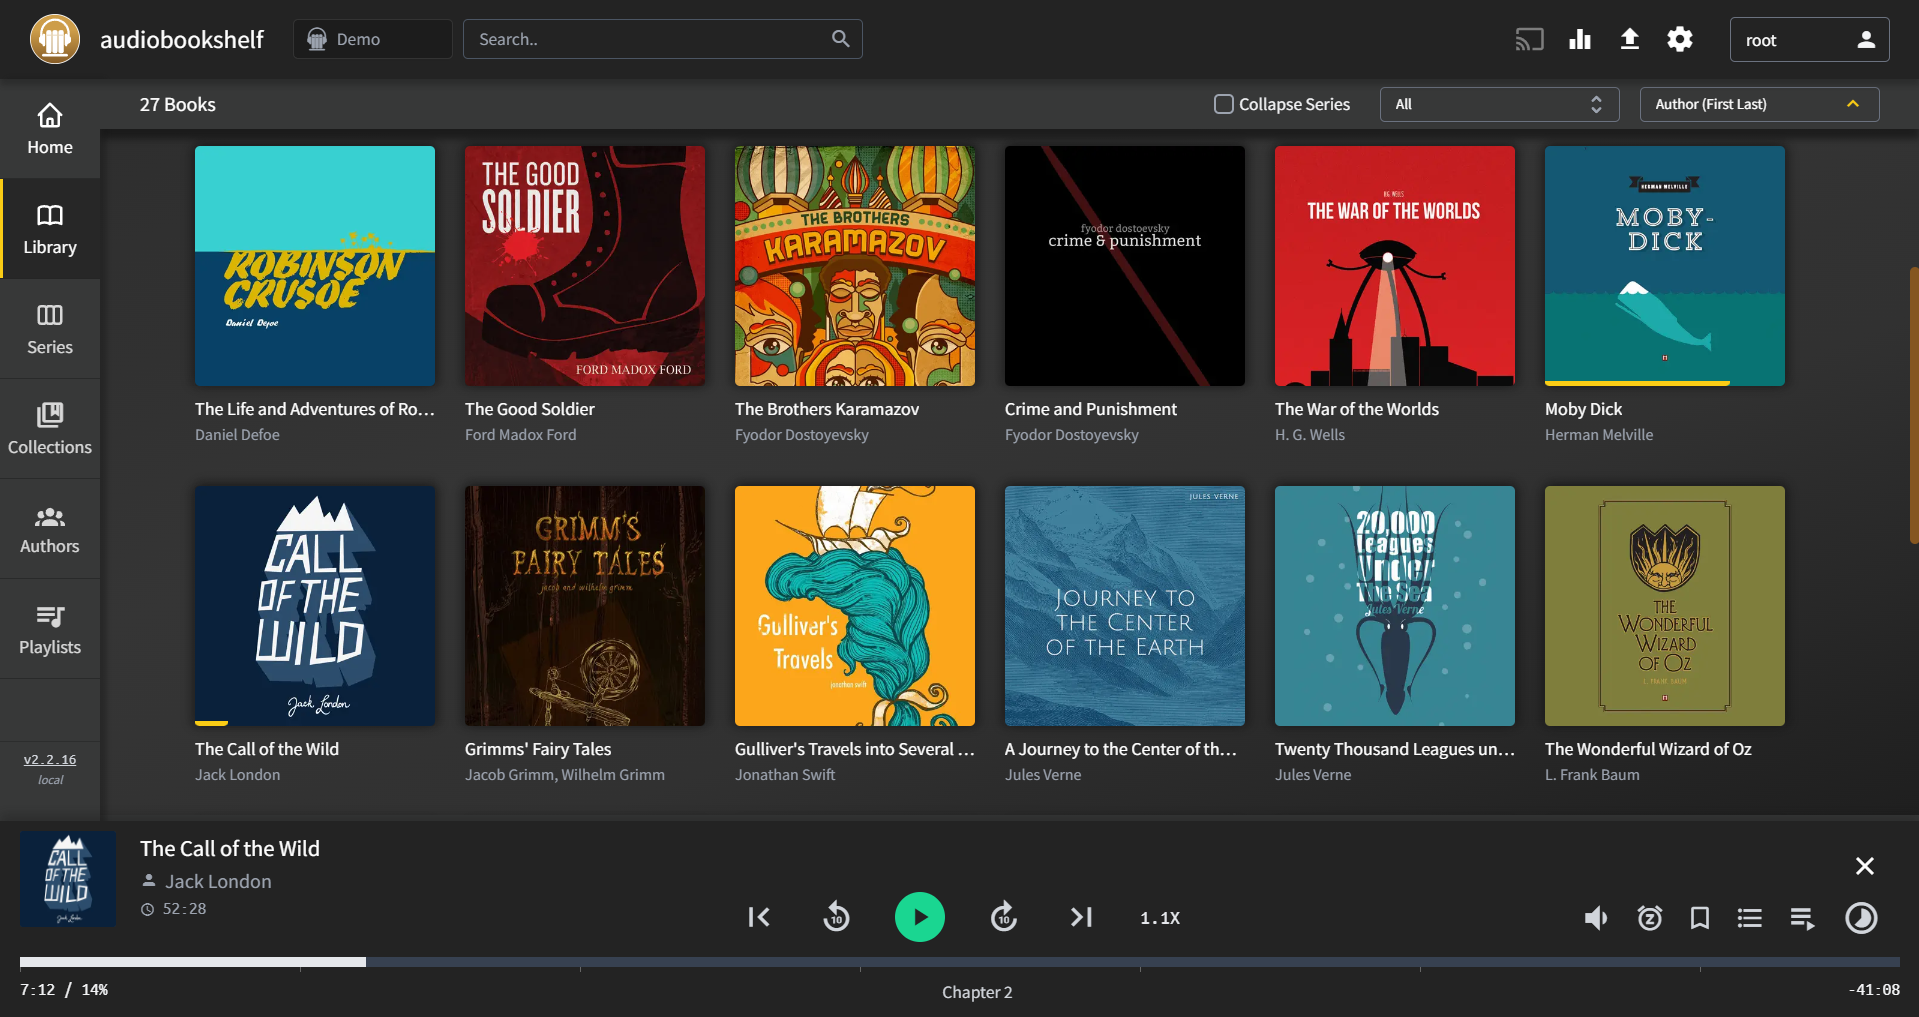
This is Audiobookshelf, a self-built audiobook and podcast server.
And there are also iOS and Android phone clients ~
Introduce audiobookshelf
Audiobookshelf is not just an audiobook library, it’s full of impressive features.
- Open source: Including Android and iOS apps (currently in test phase), which means you can modify it freely to better suit your needs.
- Full format support: No matter what your audio format is, Audiobookshelf can play it smoothly.
- Podcast search and download: You can search and add podcasts, it will automatically download updated episodes.
- Multi-user support: Multiple users can use it, each user has their own permission settings, so you can share your library with your family or friends.
- Progress sync: You can listen from where you left off on another device, without needing to remember the last position.
- Real-time updates: As long as you add new audiobooks or podcasts, Audiobookshelf will automatically detect and update the library.
- Batch upload: You can upload an entire folder at once, very convenient.
- Data backup: No need to worry about data loss, Audiobookshelf will perform automatic daily backups.
- PWA support: You can use Audiobookshelf as a web app on your phone, or cast it to Chromecast.
- Metadata and cover art retrieval: Automatically obtains metadata and cover images from multiple sources.
- Powerful navigation functionality: Search chapters through Audnexus API, you can also edit chapter information yourself.
- Merge audio files: You can merge multiple audio files into an m4b file for easy management and listening.
- Basic eBook support and reader: You can read eBooks on it, of course, the main features are still audiobooks and podcasts.
These are all the features of Audiobookshelf, next we’ll start building it.
Here is my attempt at a fluent English translation:
Setup steps:
1. Key Points
“Follow for free” to avoid getting lost.
2. Install Portainer
Refer to tutorial:
30秒安装Nas必备神器 Portainer
3. File Station
In File Station, open the docker folder and create an ‘audiobookshelf’ folder.
Create directories in sequence:
Create a audiobooksshelf folder inside the docker folder
Inside the newly created audiobooksshelf folder, create the following subdirectories:
- audiobooks
- podcasts
- config
- metadata
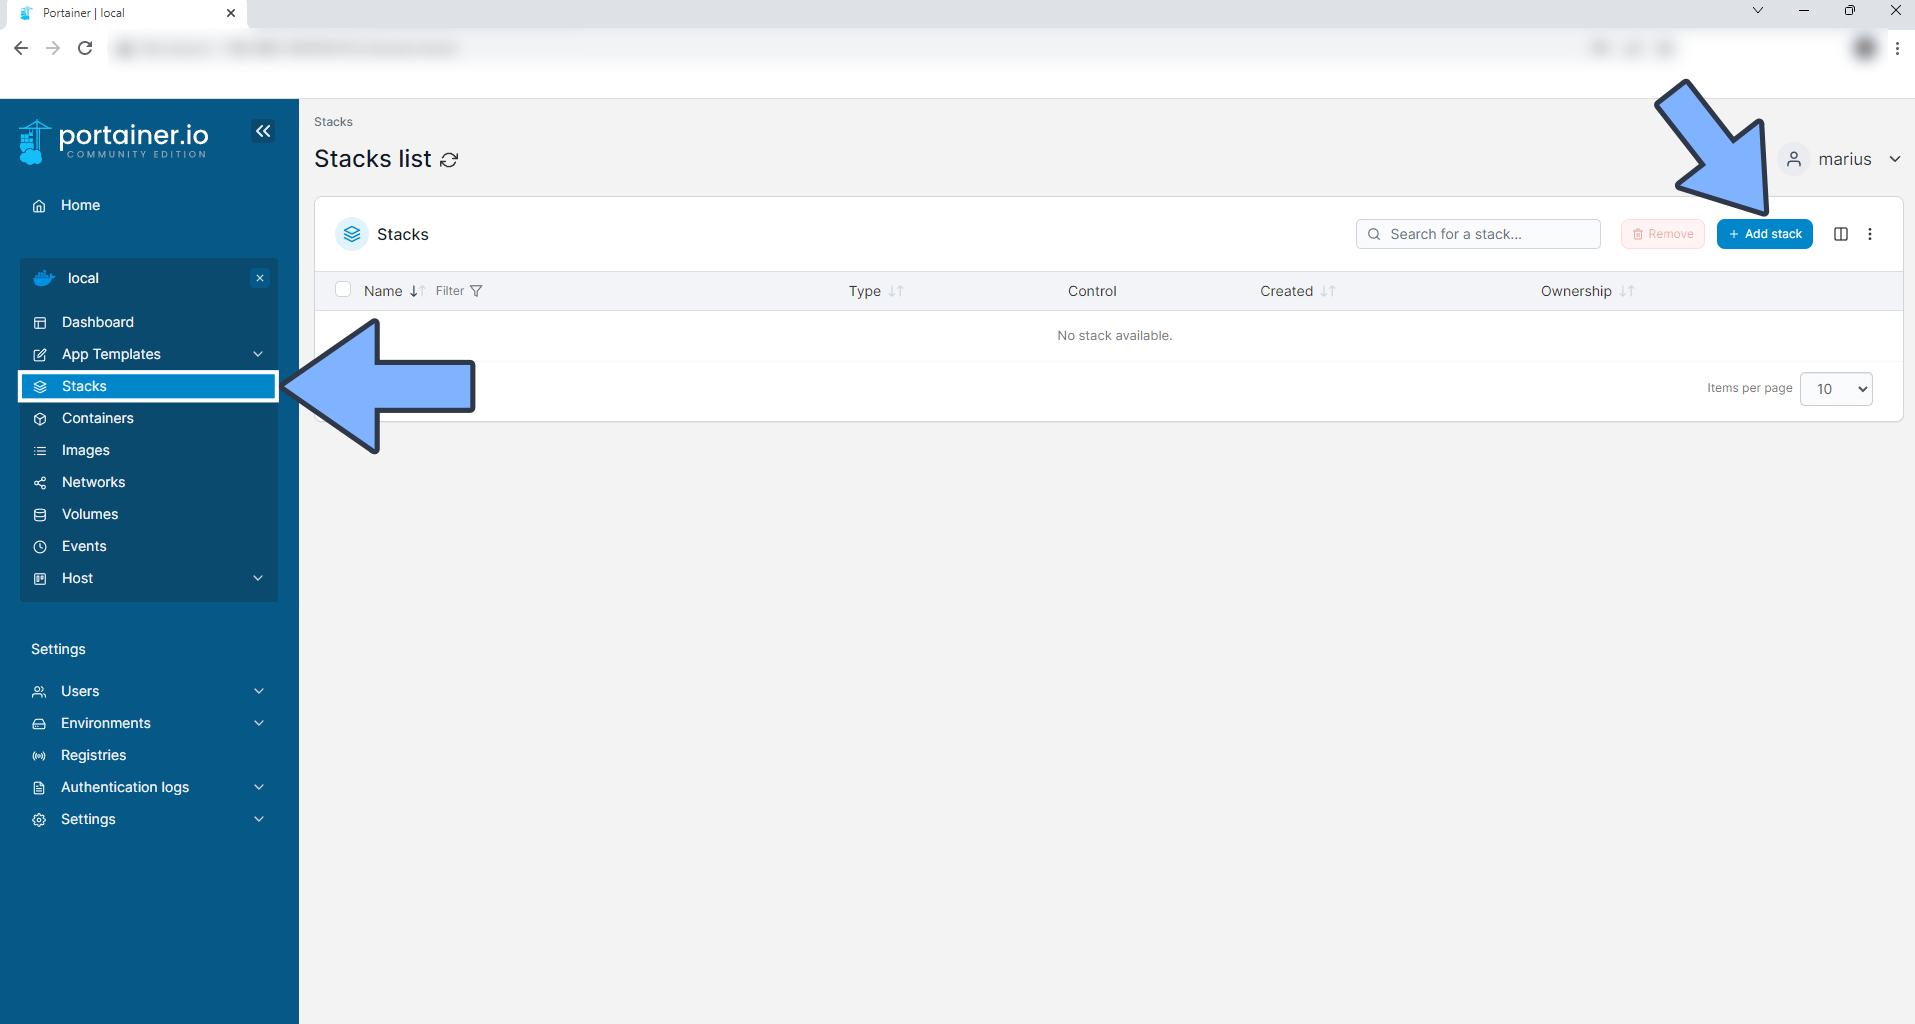
4. Create stack
5. Deploy the Code
| |
- Choose stack
- Enter “audiobookshelf” in the name field
- Paste the code into the editor
- Click deploy
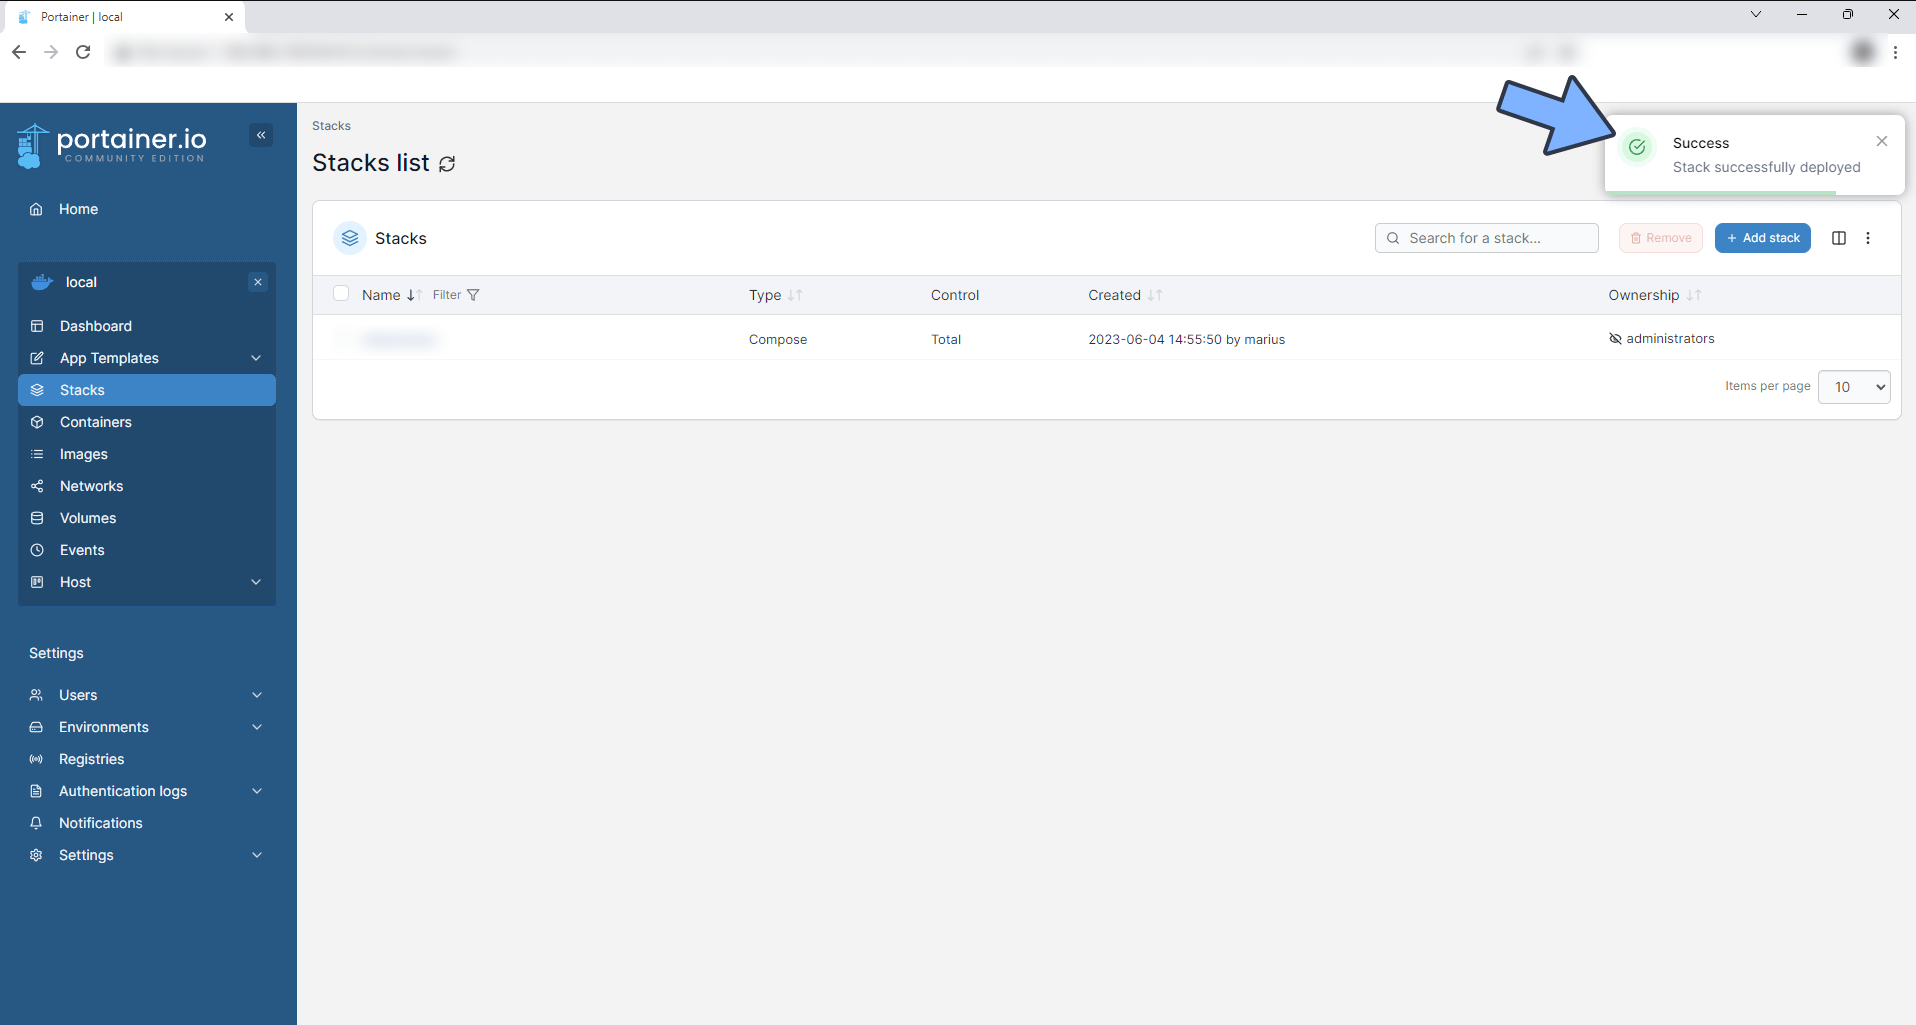
6. Success
7. Usage
Access the app via browser:[ip]:[端口]
The ip is your NAS’s ip address (in my case 192.168.2.22) and the port is the one defined in the config file above. So if you followed my tutorial, it would be 13378.
Set a password
8. Audiobooks/eBooks
Set language to Chinese
Set up media library
Set up book or audiobook
Set up podcast
- Media type: Podcast
- Media library (Custom)
- Folder (audiobooks)
Make the homepage look nice (Wooden bookcase theme)
Upload local resources (Bulk upload)
Copy local resources to the audiobooks folder
Upload local resources from web interface (Single upload)
Start scanning
Let the system match the rules for the books first
Manual scanning
Since the naming is not standardized or the relevant books are not listed in Google Books, I will need to manually scan the books.
- Choose a book, edit
- In the match field, correcting the title will find the book information.
- Submit after confirming everything is correct.
- Still not perfect because the scanner we’re using is
Google Books, which does not fully support Chinese published books. My OCD levels up! Use the English name to search.
Sure enough, the summaries are available.
This makes me more comfortable.
Although it looks like English, it does not affect me. I’m always trying to make my environment in English (to improve my English level).
9. Podcast Download (My Favorite)
I have always been a podcast lover and enjoy the reality and depth of podcasts.
The search, automatic subscription and download functions of audiobooksshelf make me very fond of it. With it, I can replace my original podcast downloader podgrab.
Without much ado, first we switch the media library, search for bloggers we like.
Submit, and you can check the box for auto download episodes if you want the episodes to be downloaded automatically.
Search for the episodes you want to listen to.
Begin playback after the download is complete.
There may be download failures due to network issues.
Since the resource library is iTunes, there are also many high-quality Chinese podcasts to choose from.
10. Mobile app
The official Android and iOS clients are available (on their own website), iOS requires joining TestFlight.
Input the password and username, when you download, connect to your ip of nas server.
PodCast
11. Attention
Finally, if you want to track your reading progress, the books you import should not be in mobi or awz3 format (Amazon’s format).
Finally
In this era of information overload and noise, audiobooks and podcasts are good ways for us to find inner calm, and I hope you enjoy today’s little toys.
Lastly, let me introduce the devices I use: 1 Synology 918, 1 QNAP, 1 PVE server. I do not recommend beginners like myself to fiddle with so many devices. I recommend beginners choose either Synology or QNAP.
Synology 923 + (latest model): Synology has built an irreplaceable image in the minds of many users with its easy to use system and minimal hassle. This model is quite powerful, sufficient for most users. With an Intel J4125 4-core 4-thread processor, it can handle multiple tasks without slowing down. The maximum 9 SATA drive bays provide abundant storage space. You can use one bay for an SATA SSD for installing the system and apps, and two bays for caching SSDs to greatly improve I/O performance.
QNAP TS-464C: After Synology, QNAP can also be mentioned. It is also an old brand manufacturer, almost 10 years old. This is QNAP’s newest 4-bay flagship NAS, with 4 3.5 inch bays and 2 NVMe SSD bays. The processor uses Intel Celeron N5095, which improves performance by 30% over the previous J4125 processor. The graphics performance increases up to 300%. It supports Intel OpenVINO AI engine, improving AI recognition performance by 41.7%. Additionally, it supports installing Google EDGE TPU artificial intelligence modules to fully enhance AI computing power. Worth noting is that QNAP SSDs can be used as storage pools and volumes, more suitable for PT and 24/7 use cases.
Hope you enjoyed this article. Please give it a like, save it, and follow【NasDaddy】 for more useful DIY app guides. Together, let’s take control of our own data and create our own digital worlds!
If you have any questions or suggestions during the setup process, feel free to leave a comment below for discussion and learning together.
如果你觉得这篇文章对你有所帮助,欢迎赞赏~
Sponsor


