
Upgrade Your NAS Functionality: How to Build Your Own Opengist Platform
1. Introduction
Do you know how you and your friends share documents, tutorials, notes, or code snippets?
This is a typical use case where you need a dedicated place, a place where you can easily upload, share, view, and manage code. This is why we need to build our own Opengist.

Introducing Opengist
Opengist is a self-hosted pastebin powered by Git. It is an online platform where you can create, share, and manage your code snippets. It has many features:
- Create public or hidden documents/code snippets: You can create public code snippets or snippets that can only be accessed through a link, depending on your needs.

- Clone/Pull/Push code snippets using Git: You can use familiar Git operations to handle your code snippets.
- Revision history: You can see all the modification records of your code snippets and understand their development process.

- Code highlighting, support for Markdown and CSV: Your code will be automatically highlighted and supports Markdown and CSV file formats, making your code more readable.
- Like/Share code snippets: You can like other people’s code and share your code with others.
- Search for all code snippets or code snippets from specific users: Conveniently find the code you need.
- Light/Dark mode: Set the interface theme according to your preference.
- Responsive user interface: The interface will automatically adapt to your screen size, whether you are on a computer or a mobile phone.
In addition, as an administrator, you have the following permissions:
- Enable or disable registration: You can control who can register on your Opengist platform.
- Restrict or remove restrictions on the visibility of snippets for anonymous users: You can control which code snippets anonymous users can see.
- Admin panel: Delete users/code snippets, clean up the database/file system by synchronizing code snippets: You can easily manage your Opengist platform.
That’s the basic introduction to Opengist. Next, I will show you how to build your own Opengist.
Installation Steps:
1. Key Point
Follow for free and don’t get lost
2. Install Portainer
Tutorial reference: 30-second Installation of Portainer, a Must-Have Tool for NAS
3. File Station
Open File Station and create an opengist folder in the docker folder.

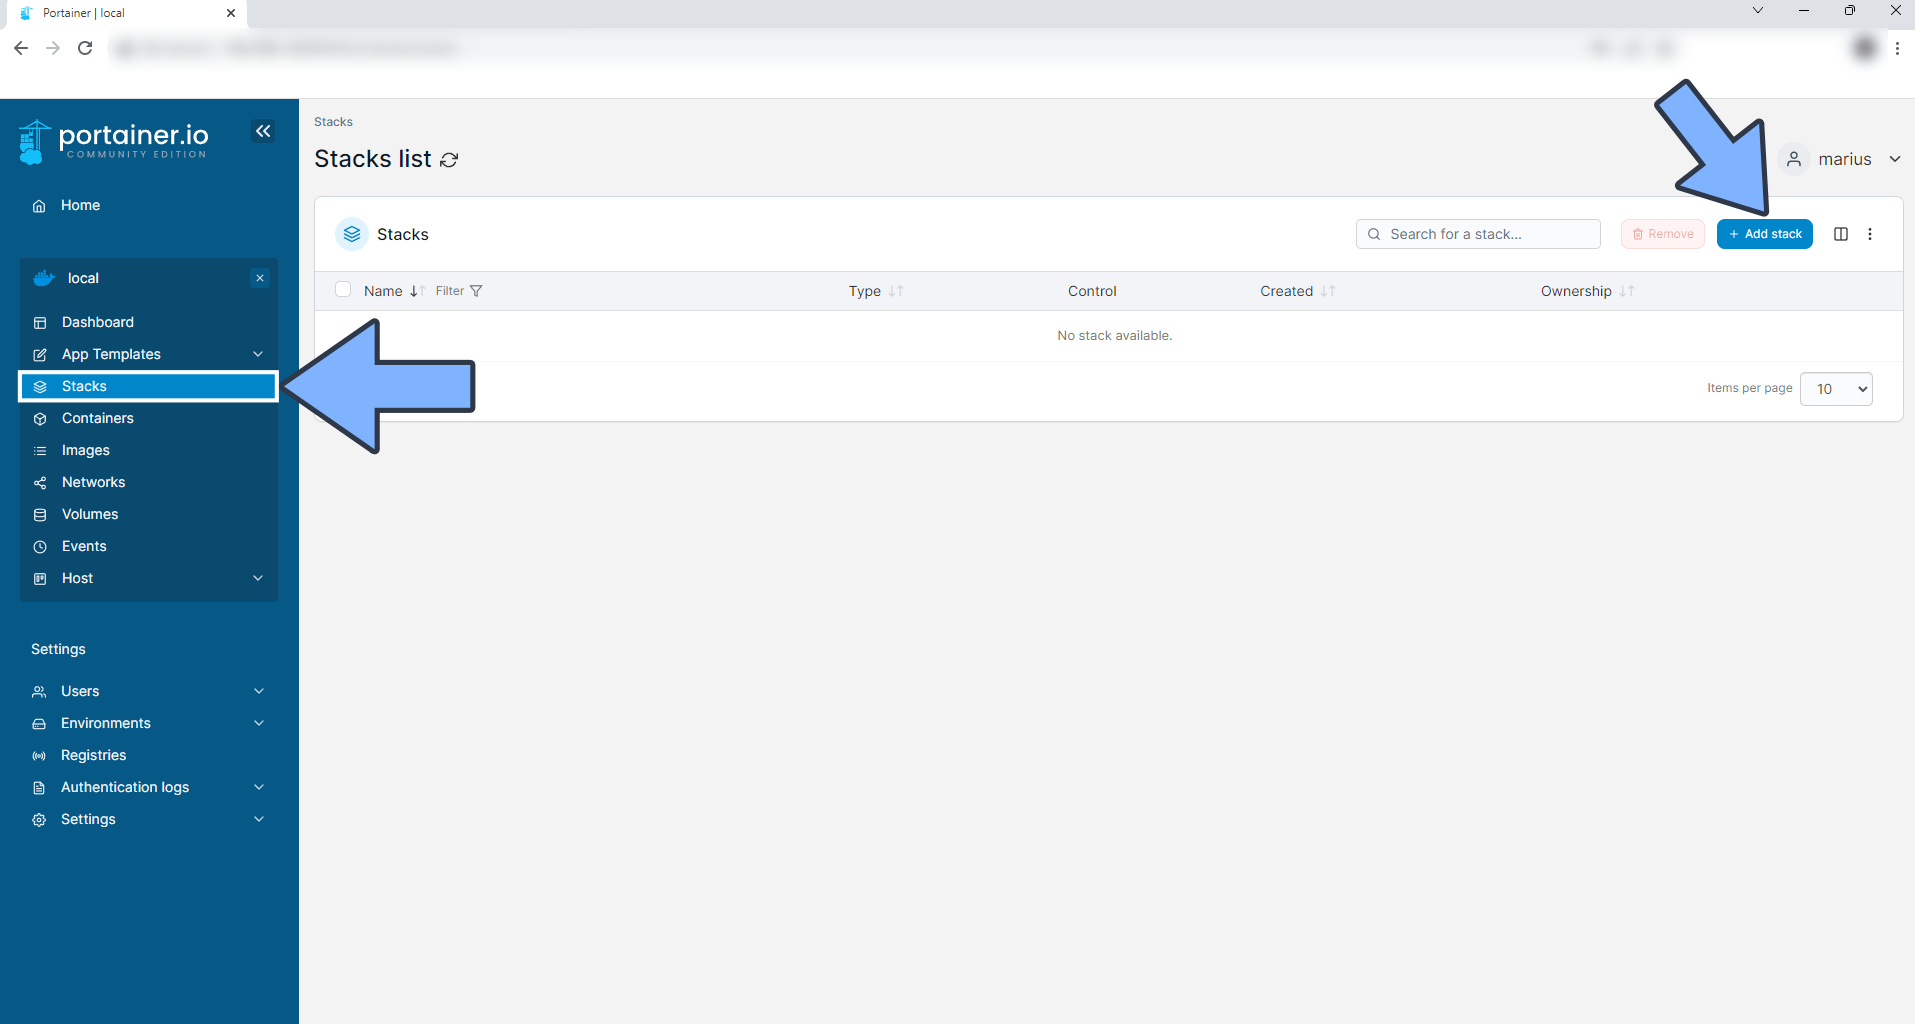
4. Create Stack
5. Deployment
| |
services: opengist: container_name: Opengist image: ghcr.io/thomiceli/opengist:1 healthcheck: test: curl -f http://localhost:6157/ || exit 1 mem_limit: 2g cpu_shares: 768 security_opt: - no-new-privileges:true restart: on-failure:5 ports: - 6157:6157 #- 2222:2222 # SSH port, if not needed, can be removed volumes: - /volume1/docker/opengist:/root/.opengist environment: CONFIG: | log-level: info
| |
如果你觉得这篇文章对你有所帮助,欢迎赞赏~
Sponsor