
A Must-Have for NAS Experts: A Comprehensive Guide to Easy Document Management with Paperless-ngx
1. Introduction
After all the tinkering, I realized that 90% of NAS applications are useless.

Only 3 or 2 of them are actually useful.
Most of the time, after following various guides and tutorials to set them up, we just leave them there untouched.
From the first NAS I had, the Star Snail, to now, after 8 years, I have researched countless self-hosted applications.
The protagonist I am introducing today belongs to the remaining 10% that are actually useful.
To be more precise, it can be considered as the top 1% among this 10% of usefulness.
The benefits it brings me are not only related to life and work, but also to better document management and file search.
Thanks to it, I have saved at least 500 hours.
Before formally introducing it, I want to talk about another topic: why I have always been unable to leave the Apple ecosystem.
The Apple ecosystem has brought me not only convenient systems, security, and smooth integration of all devices, but also one of the biggest reasons: Apple’s powerful photo-OCR function.
For example, if I want to find a chat screenshot from a conversation I had with a seller a while ago, in order to provide evidence,
Compared to the previous method of searching through each image one by one, I can now simply search for the keyword screwdriver. Apple Photos will directly locate the image that contains a screwdriver.


If you are not familiar with this feature yet, don’t rush to try it yourself.
The toy I am introducing to you today can bring you the same:
- The same effect as the Apple feature.
- Hosted on
your NAS. - Complete control over your data.

- It also supports
online preview:

- It supports all
digital documents: Not only images, but also PDFs, Word documents, Excel spreadsheets, and even Markdown files. It truly achieves document digitization, unified management, and efficient search.

This is the new toy I am bringing to you today, Paperless-ngx. As the name suggests, it is all about going paperless.
It can help you organize your contracts, physical documents, bills, and more, while also managing digital documents (Word, Excel, PDF, etc.).
Introduction to Paperless-ngx
Paperless-ngx is not just a document management system. It is a complete solution that converts your physical files into searchable online archives, reducing the use of paper. Its core features include:
- Document organization and indexing: Organize scanned documents using tags, correspondents, types, and more.
- OCR text recognition: Perform optical character recognition on documents to enable text search and selection, even for documents with images.
- Multi-language support: Utilize the open-source Tesseract engine to support over 100 languages.
- Long-term storage format: Save documents in PDF/A format, designed for long-term storage.
- Intelligent tagging and classification: Automatically add tags, correspondents, and document types using machine learning.
- Wide range of file support: Support for PDF documents, images, plain text files, Office documents, and more.
- Customizable file management: Paperless-ngx manages file names and folders, supporting different configurations.
- Modern web application: Customizable dashboard, filters, batch editing, drag and drop upload, custom views, shared links, and more.
- Full-text search: Auto-complete, relevance ranking, and highlighting of matched query parts.
- Email handling: Import documents from email accounts and configure multiple accounts and rules.
- Multi-user permission system: Built-in robust multi-user permission system.
- Multi-core system optimization: Parallel processing of multiple documents.
Setup Steps:
1. Key Points
Follow for free to stay on track.
2. Docker Management GUI Tools
Synology DSM 7.2 or above can directly use Container Manager
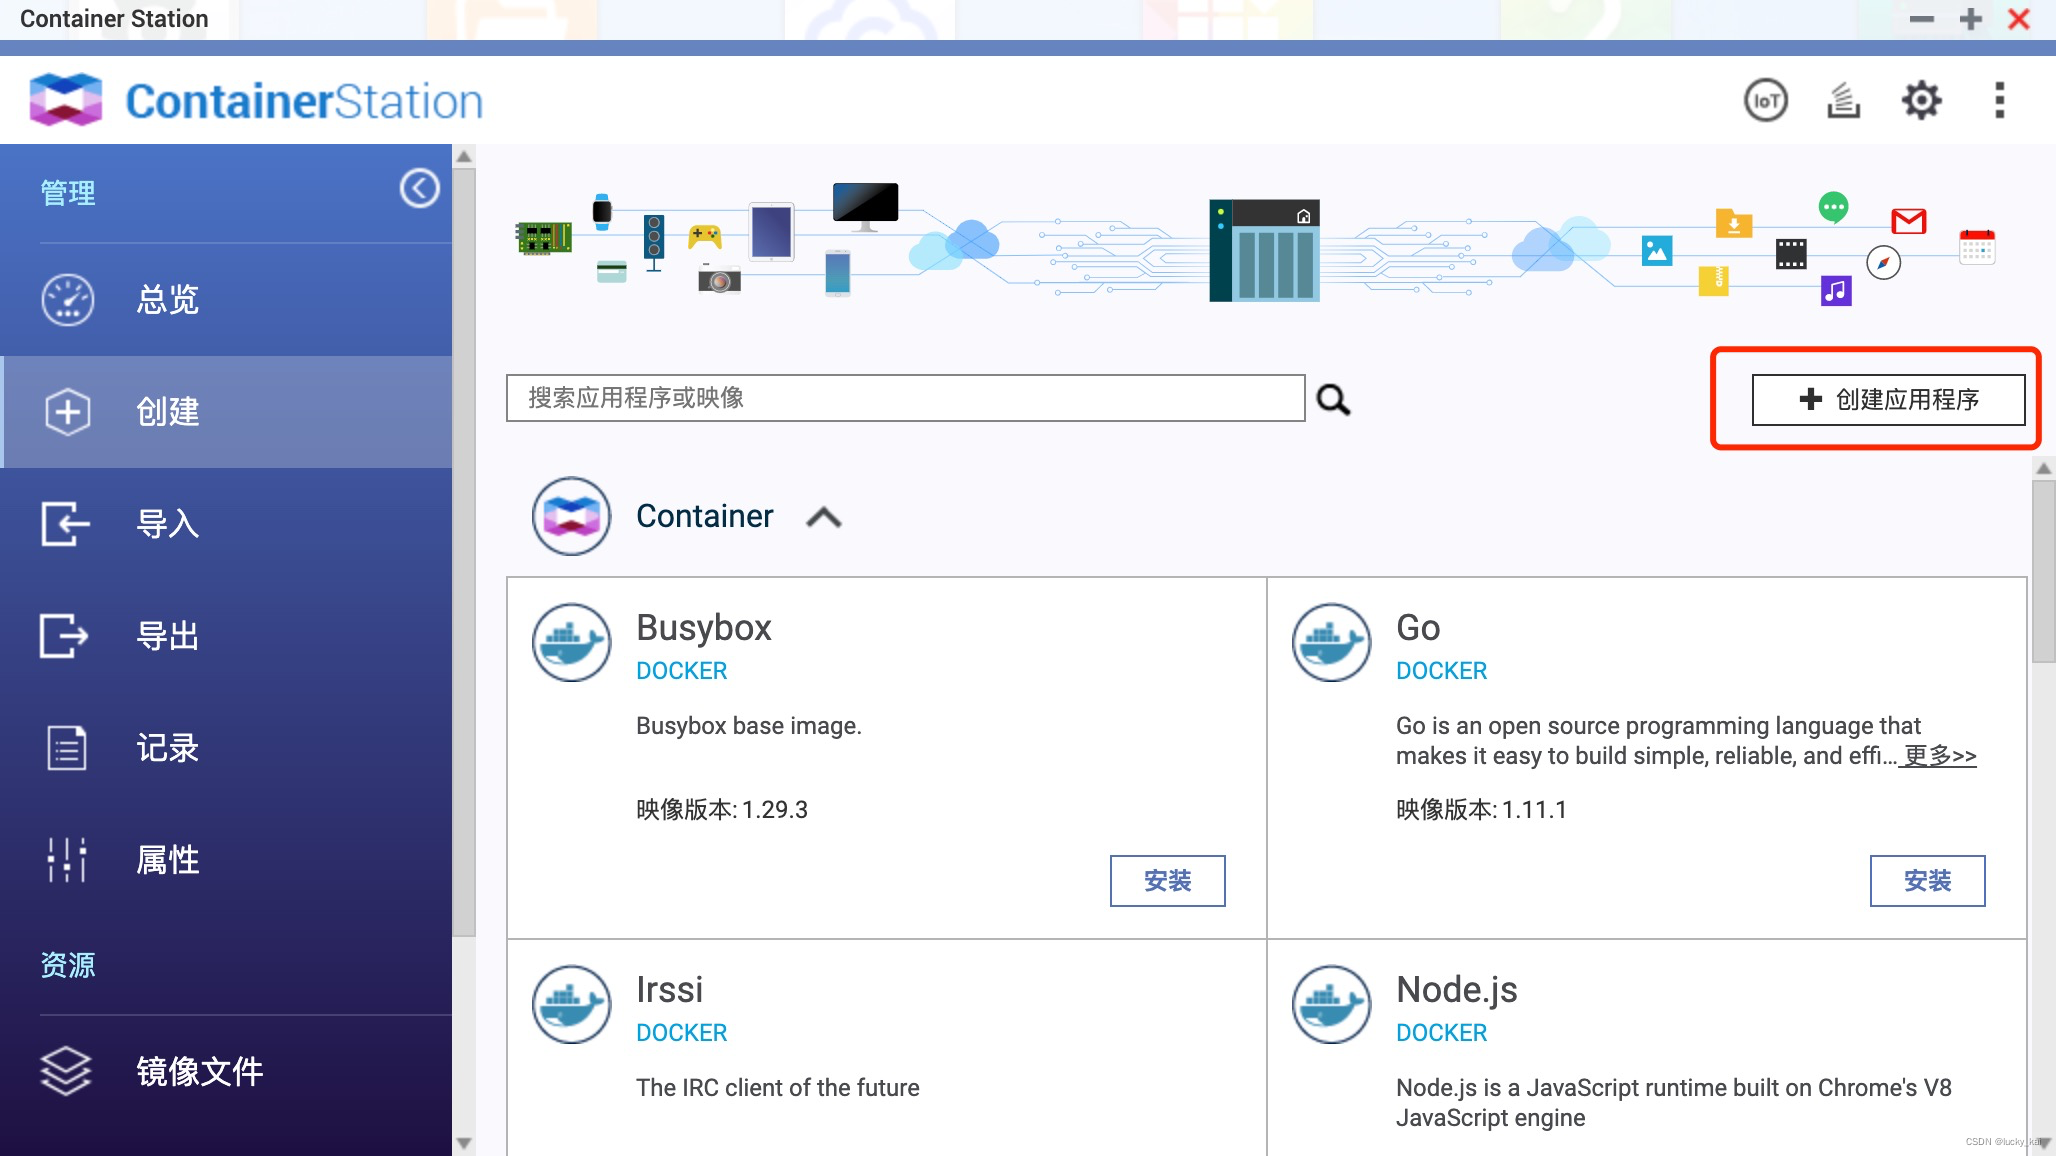
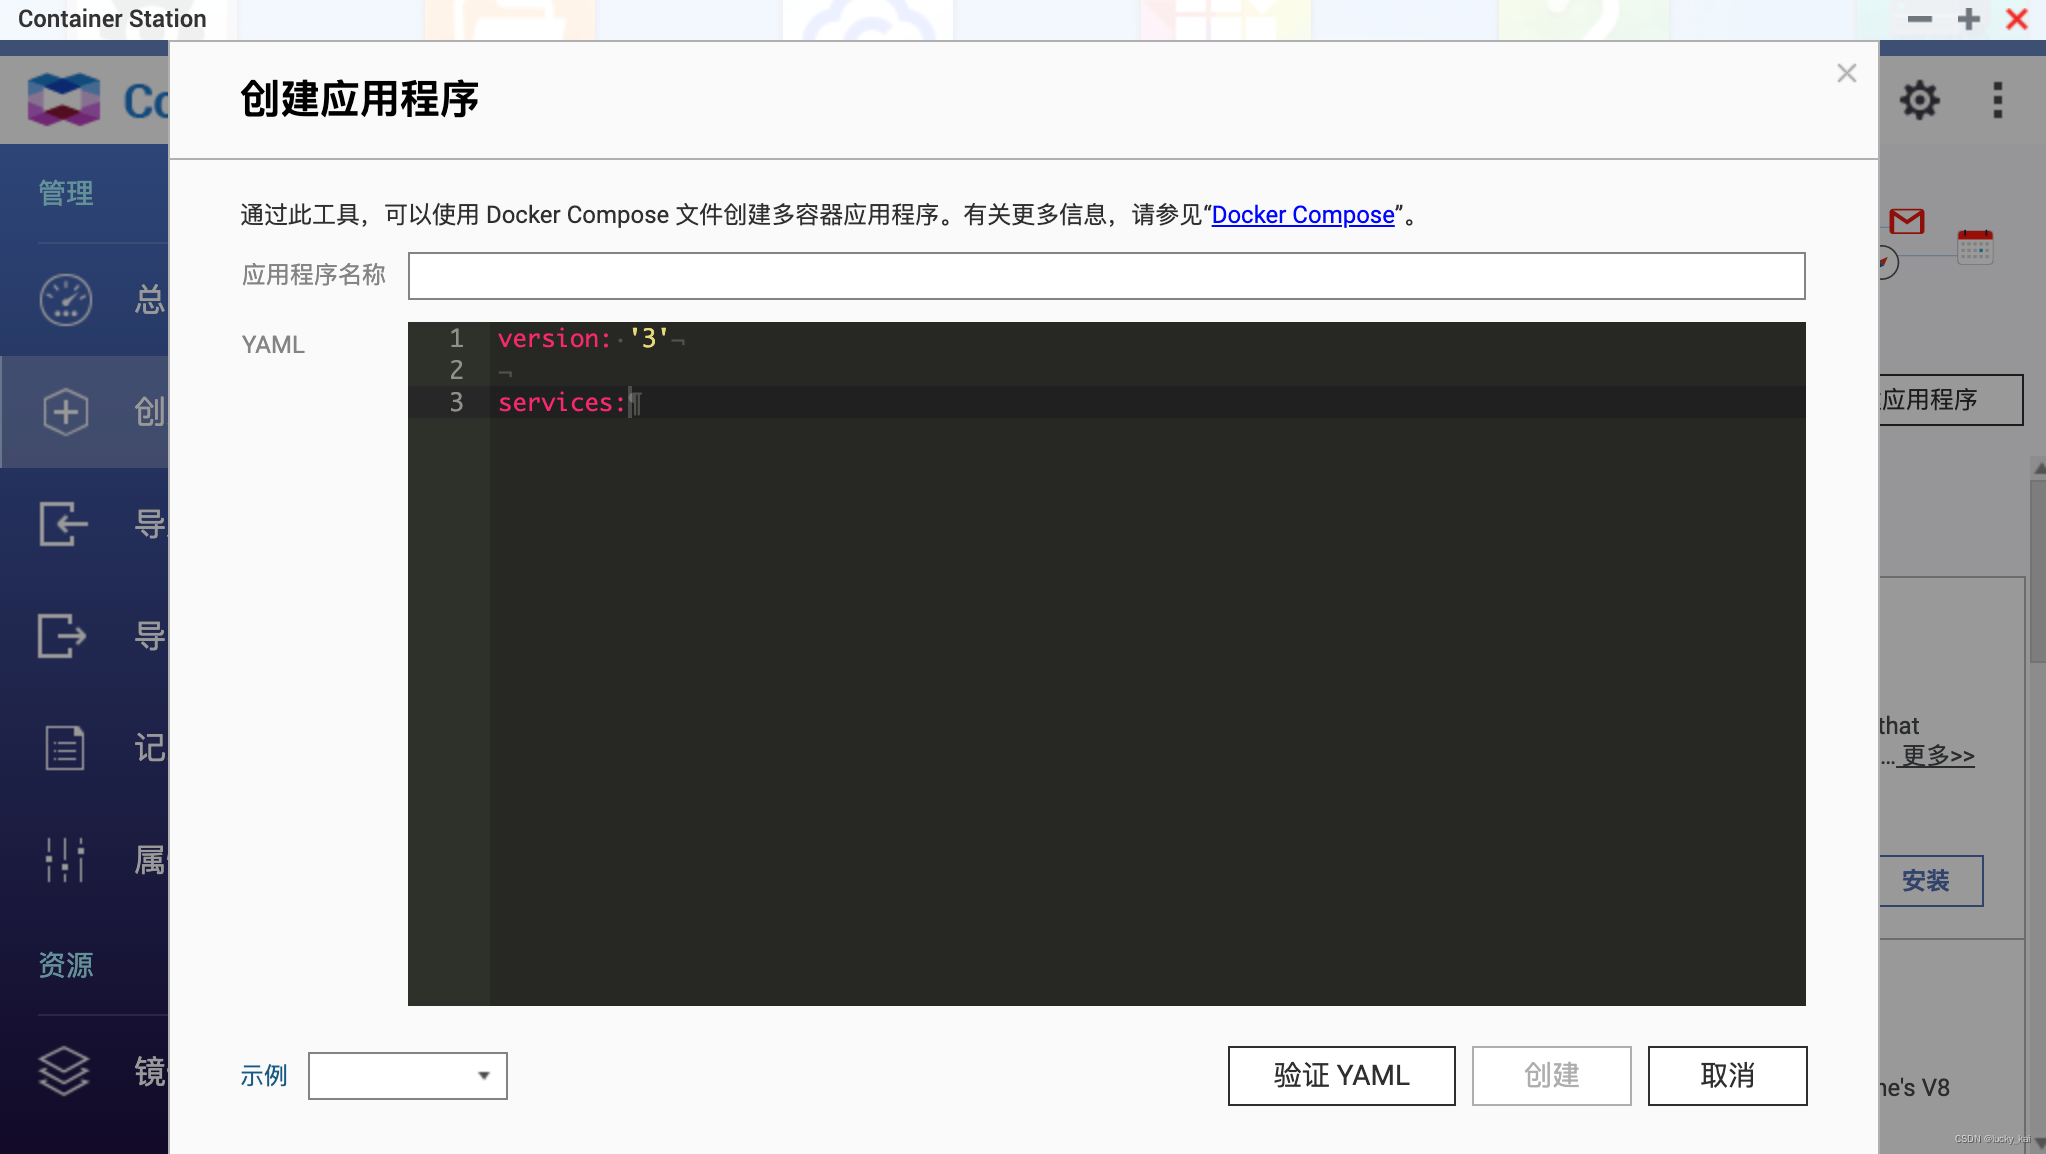
QNAP ContainerStation
Install Portainer Yourself
Tutorial reference:
Install Portainer in NAS in 30 seconds
3. File Station
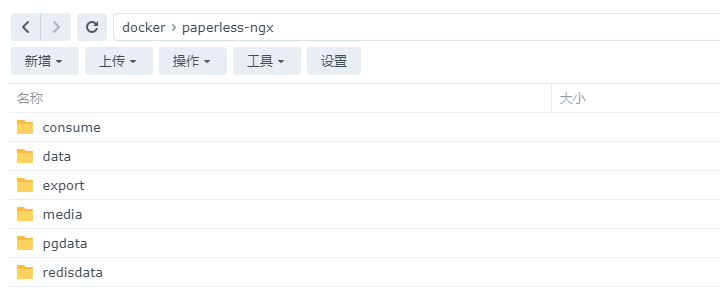
- Open File Station and create a
paperless-ngxfolder in the docker folder.

- Create the following directories inside the
paperless-ngxfolder:- consume
- data
- export
- media
- pgdata
- redisdata
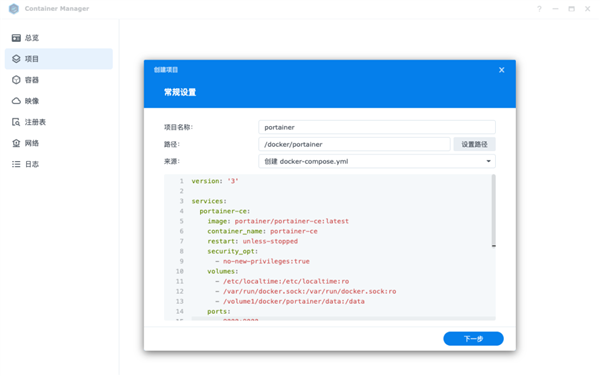
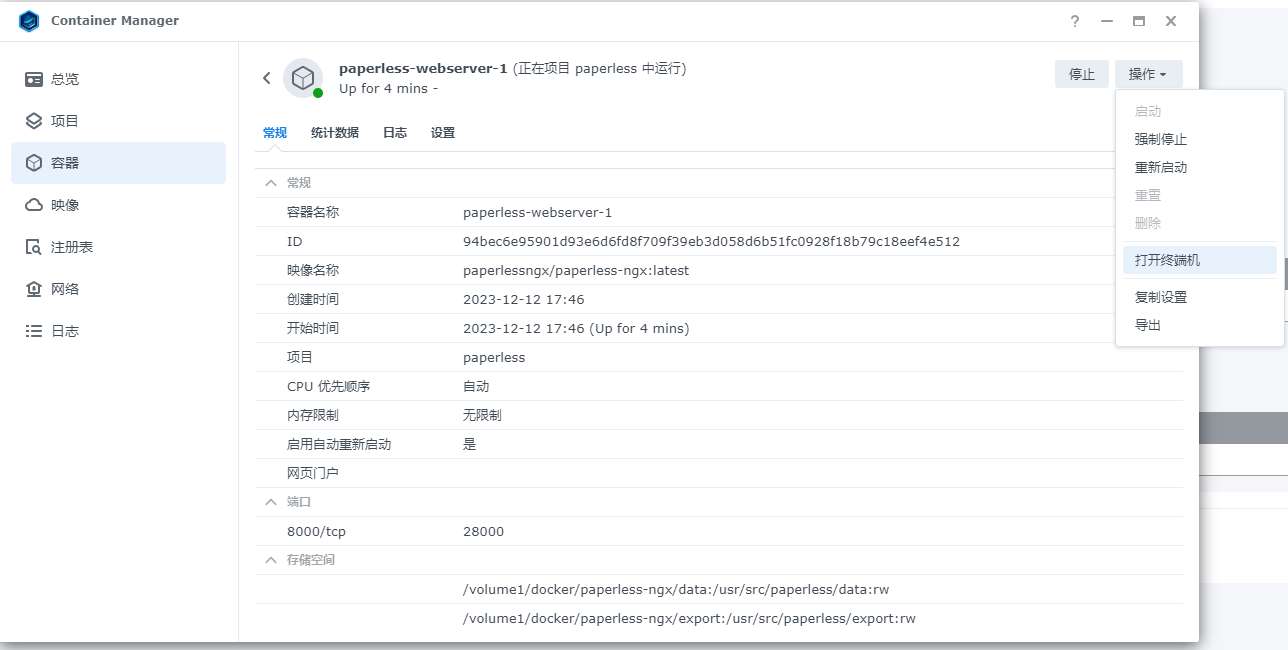
4. Container Manager
I am using Synology’s Container Manager for this setup, but Portainer and QNAP are similar:
Upload Configuration
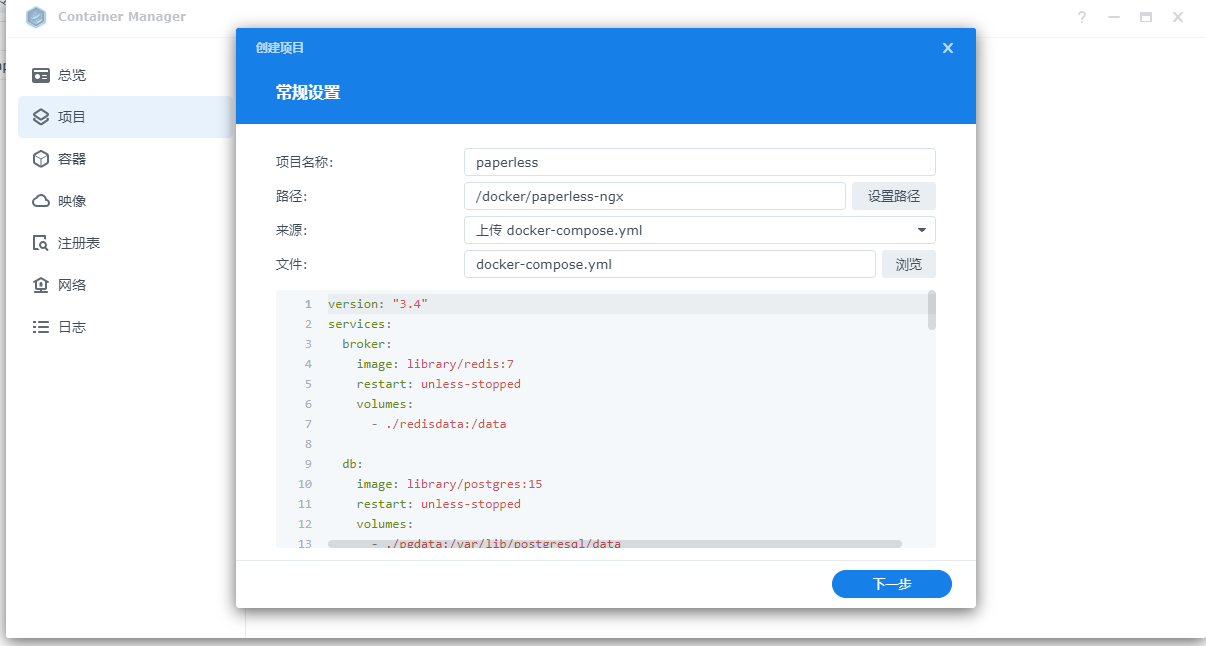
Copy the following configuration:
| |
Explanation of the configuration (customizable):
I have marked the parts in the above file that I think can be modified with “# change it if you like”. For the rest of the parts, it is not recommended for beginners to modify.
webserver’s port section: you can change it to another port number such as “
38000:8000”,do not modify the 8000 at the endPAPERLESS_OCR_LANGUAGES: set the
supported languagesfor paperless, chi-sim chi-tra (Simplified Chinese, Traditional Chinese), you can add the language you want, such as jpnIn addition, the system already includes English, German, Italian, etc.
PAPERLESS_OCR_LANGUAGE:
default language for OCR, I have set it to English and Simplified Chinese herePAPERLESS_TIME_ZONE: set your time zone
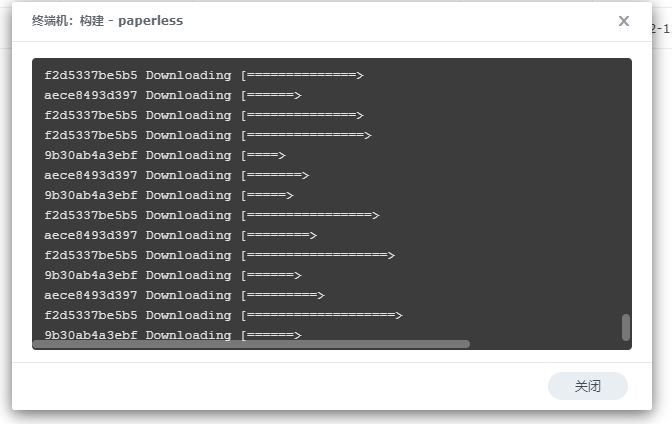
Wait:
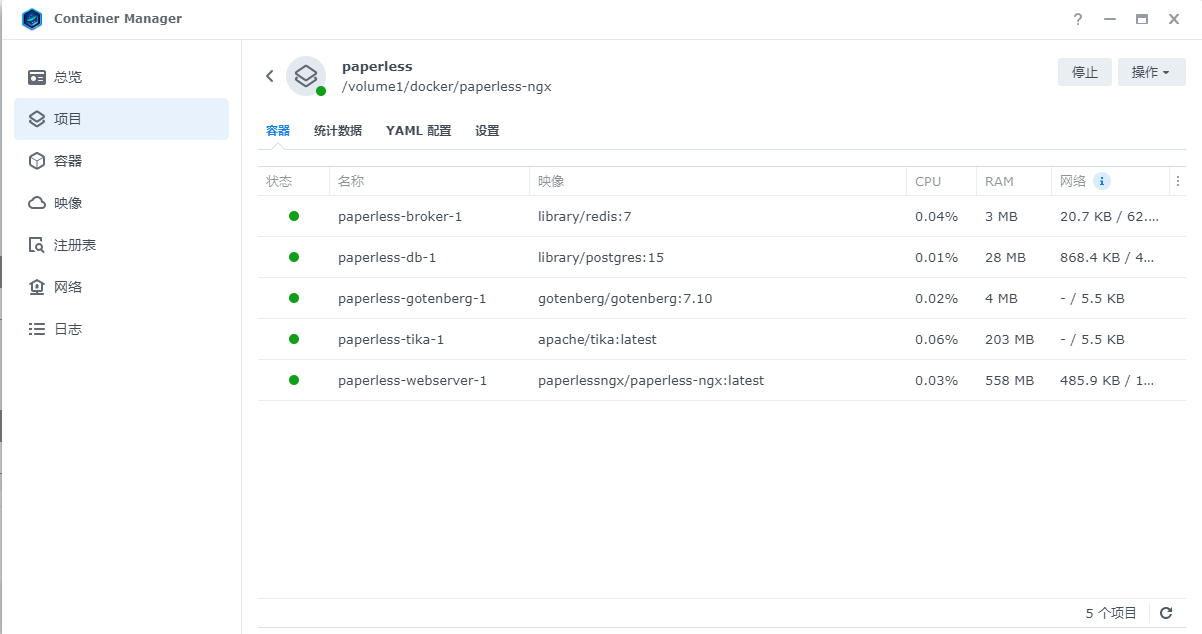
Done:
5. Usage
Access the program in the browser: [ip]:[port]
ip is the IP address of your NAS (mine is 172.16.22.22), and the port is defined in the configuration file above. If you follow my tutorial, it is 28000.

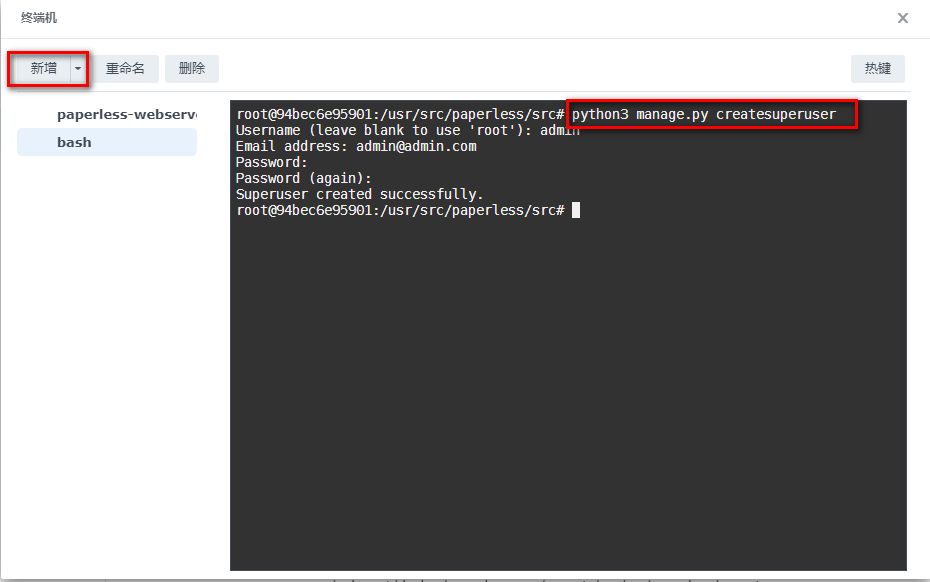
But it seems that you don’t have a username and password yet, so let’s create an account and password:
Select the webserver container and open the terminal:
python3 manage.py createsuperuser
Enter the following information:
- username
- password
6. Special Features Showcase
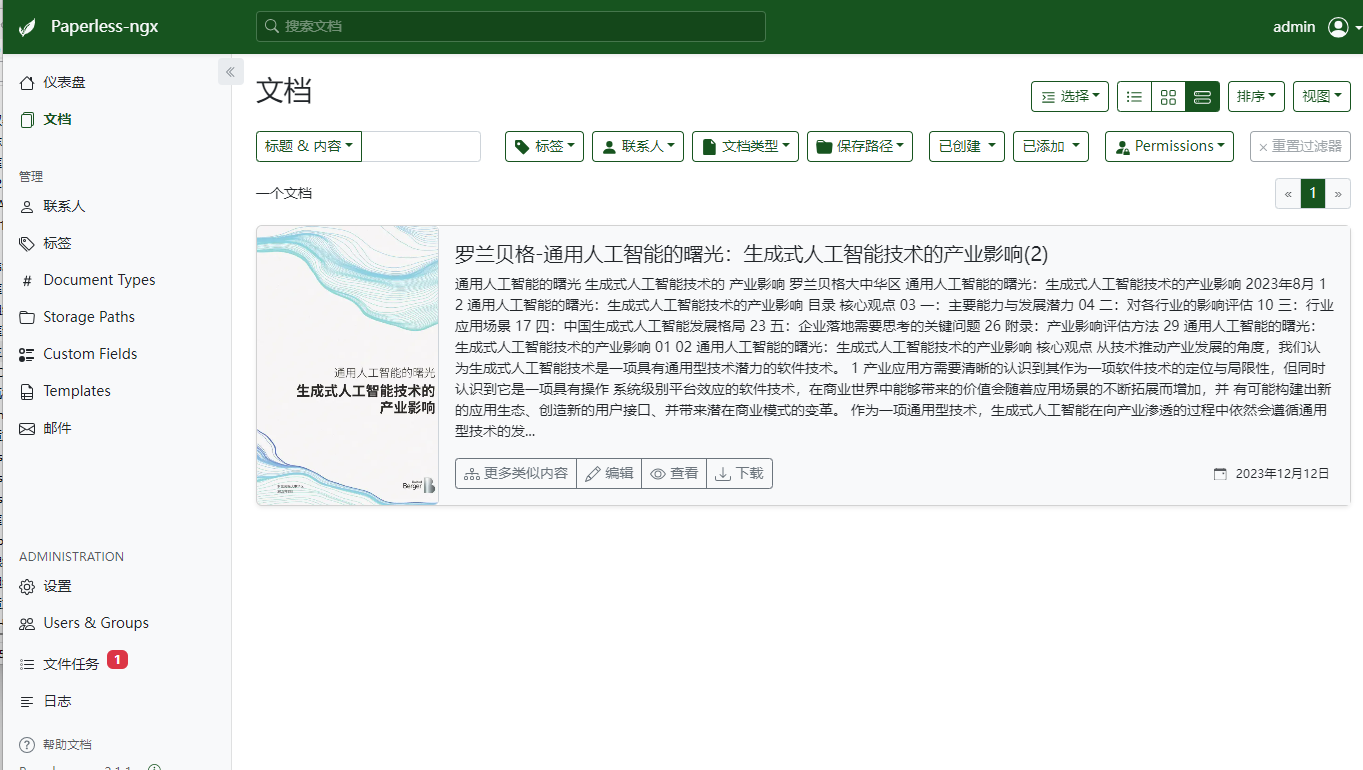
Home Page:

Test PDF File:

The text has been extracted:
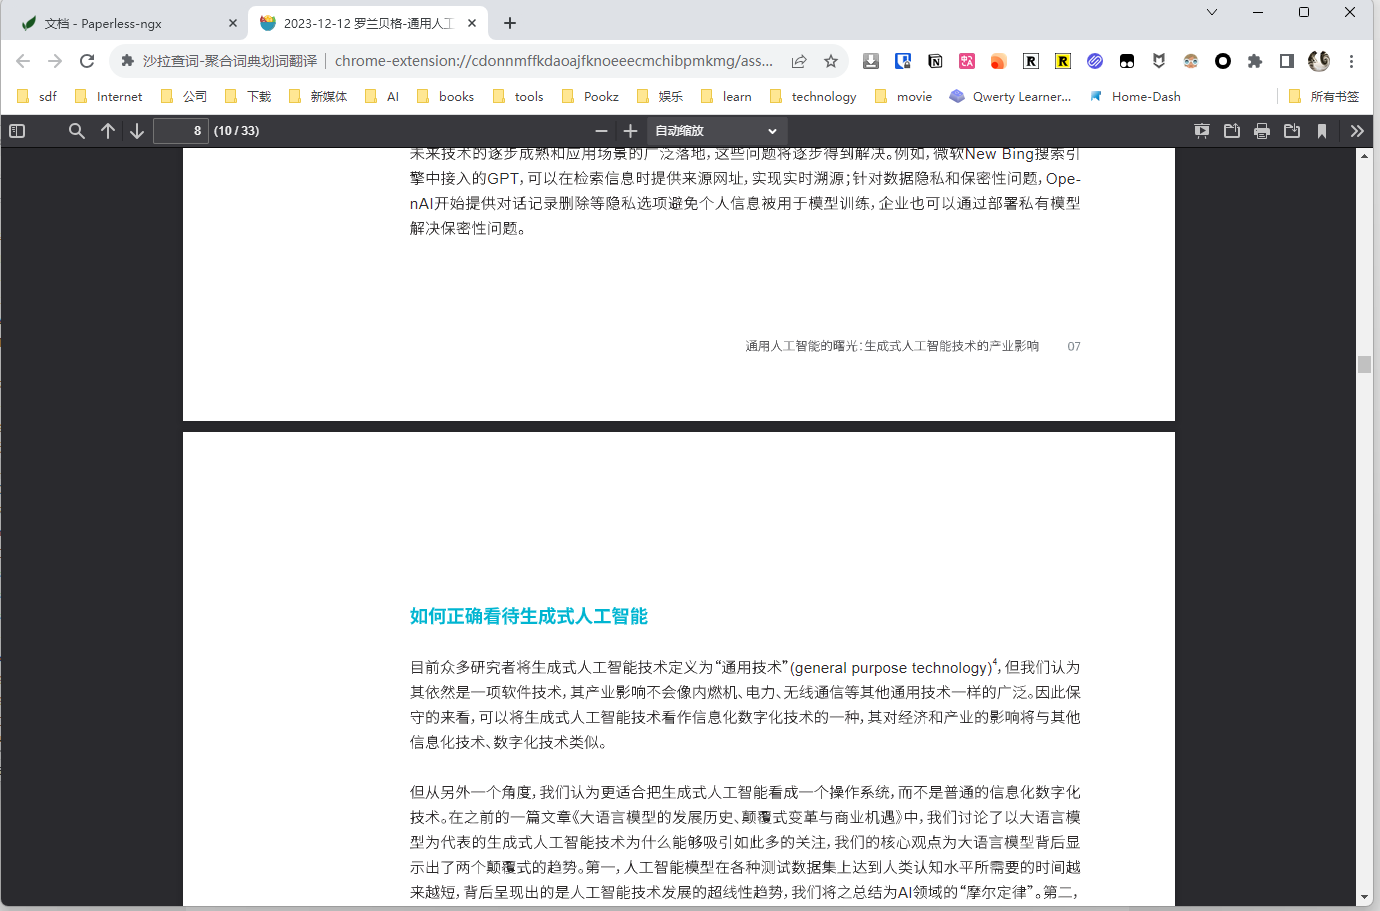
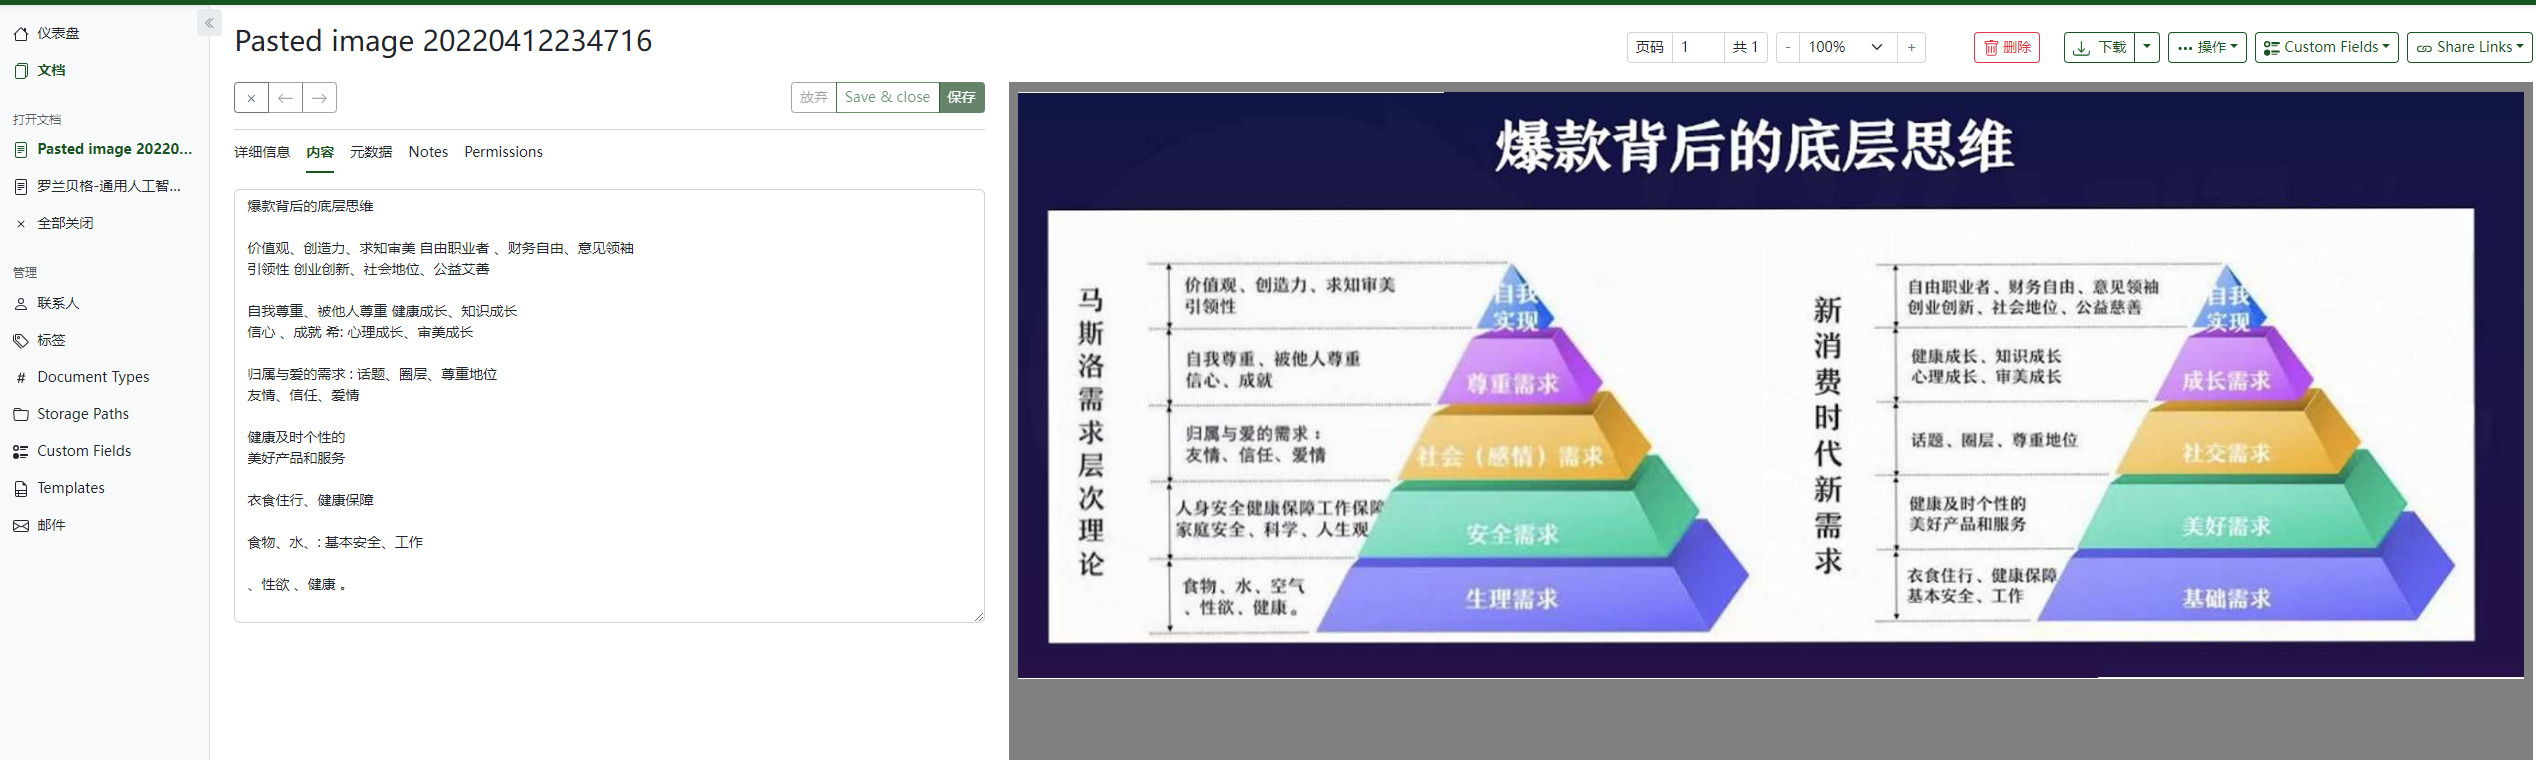
Online Preview:
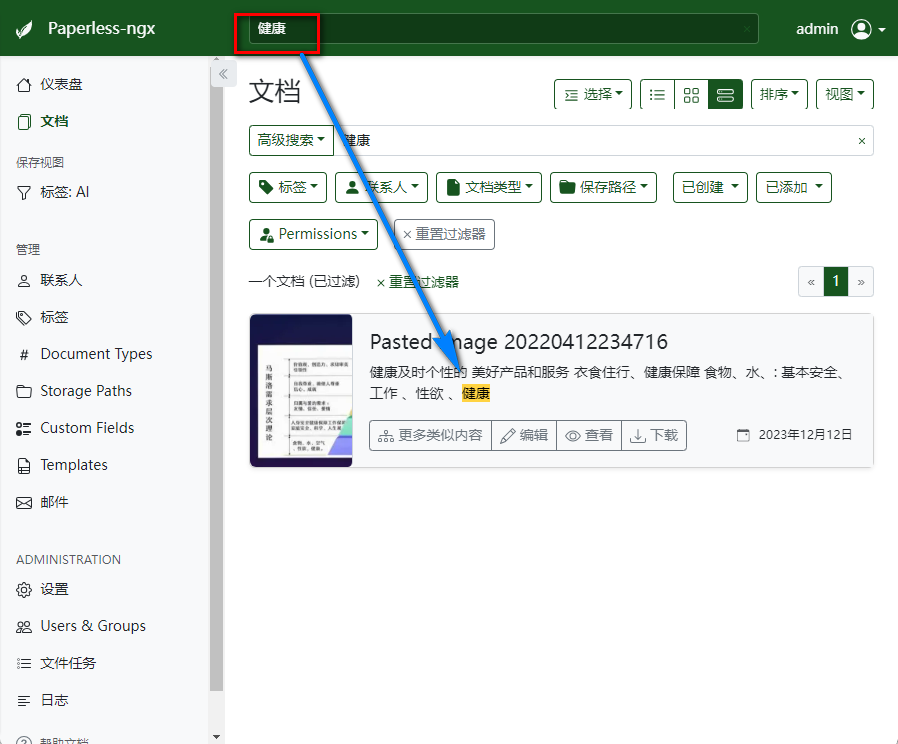
Search Function:

Images:

In the edit view, you can see the recognized result and make modifications:
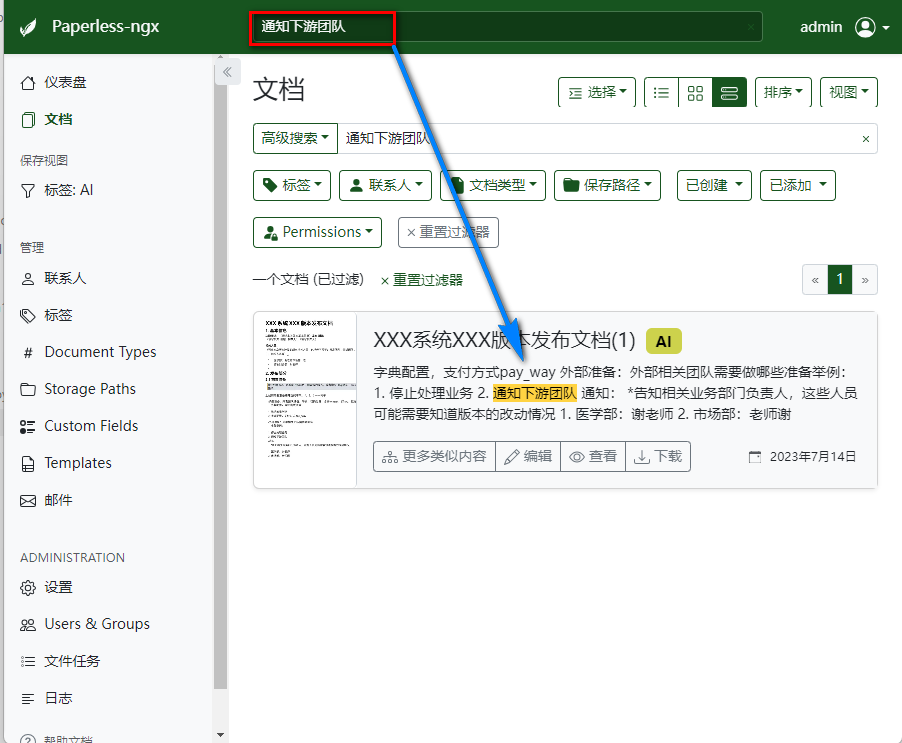
Search:
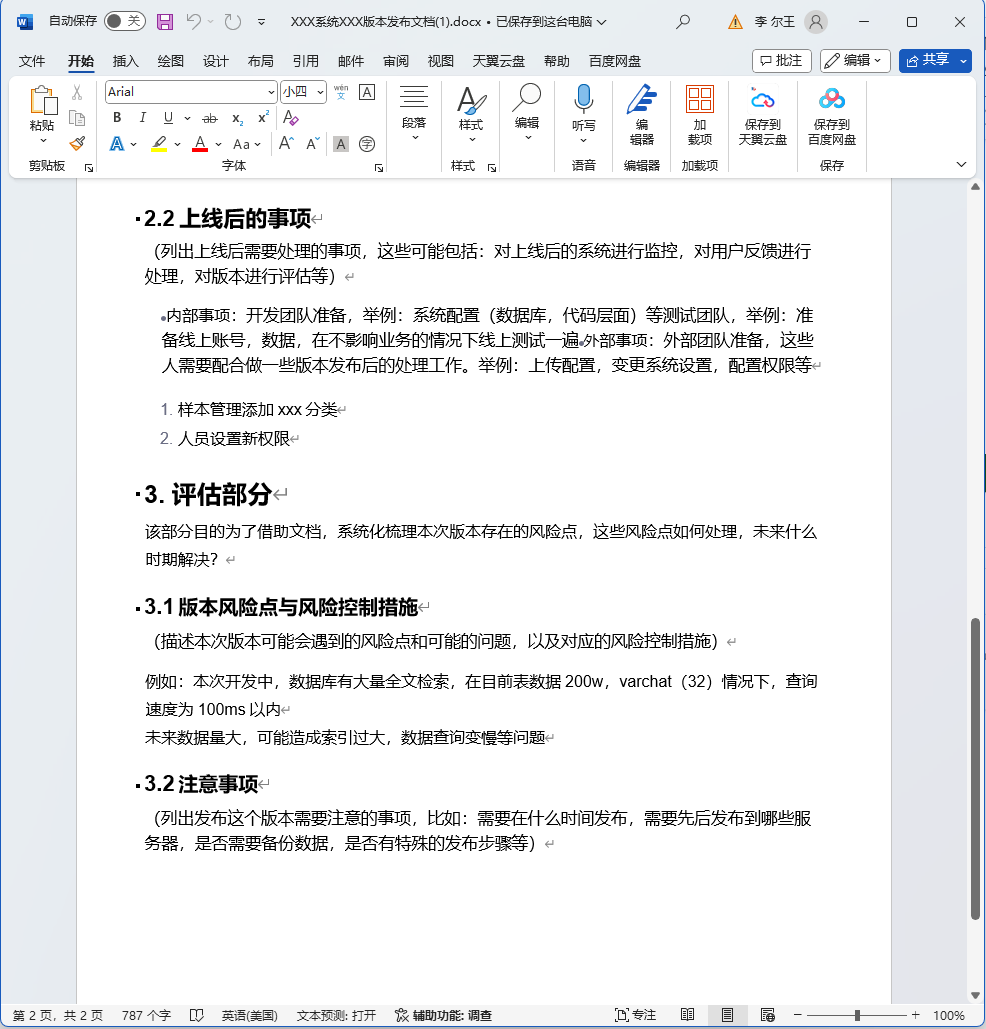
Trying with Word Files:
Other Apps / Support
You can also download third-party app paperless_app

You can also choose to use other scanning apps and then import them into pp (better recognition), such as the free Microsoft Lens


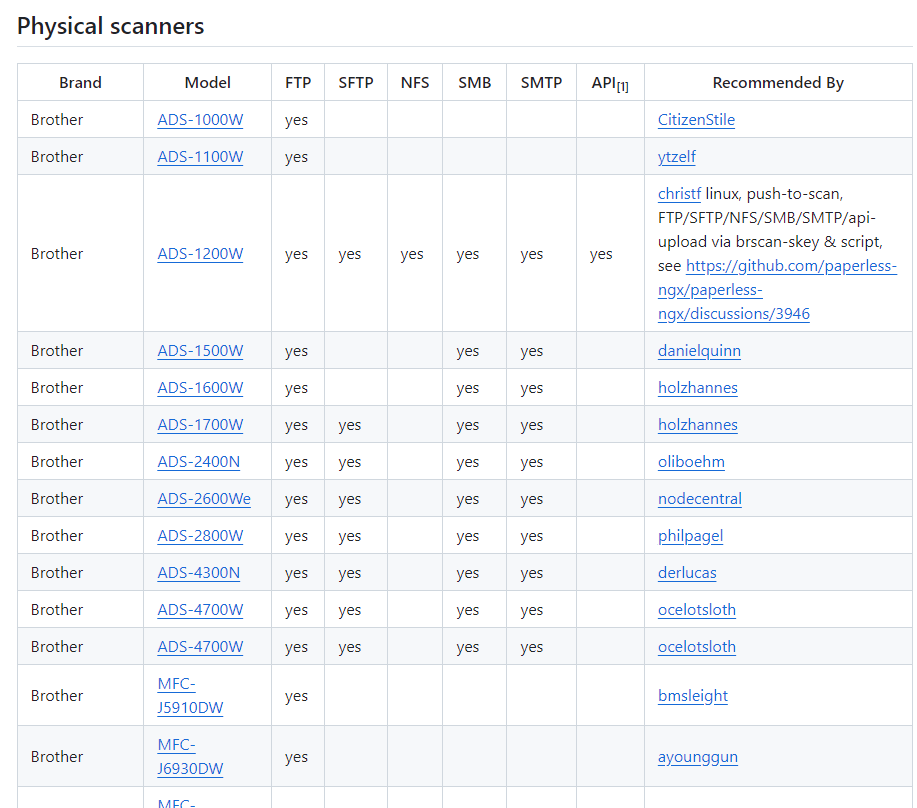
You can also choose to connect your physical printer and automatically upload to paperless:
If you have more ideas, please feel free to share.
Finally
If you like this article, please remember to like, bookmark, and follow Dad’s Digital Garden. We will continue to bring more practical self-built application guides. Together, let’s take control of our own data and create our own digital world!
If you encounter any problems or have any suggestions during the setup process, please feel free to leave a comment below for discussion and learning.
如果你觉得这篇文章对你有所帮助,欢迎赞赏~
Sponsor