30-Second Installation of Portainer, a Must-Have Tool for Nas
Introduction
😒 Have you ever envied others for being able to build so many fun applications while you struggle with “not knowing how to code”?
And their so-called “simple tutorials” are like this:
Have you ever been intimidated by tutorials that are “too complicated”?
Do you wish to make everything “a little simpler”?
Today, I will teach you how to install Portainer, a must-have tool for Nas, in just 30 seconds.
How to Build Your Own Weibo
- Randomly express your thoughts without worrying about others seeing them.
- Completely save them on your Nas.
- Invite your good friends to come and have fun, share funny pictures.
How much trouble do you think this would be? With Portainer, it only takes 2 steps:
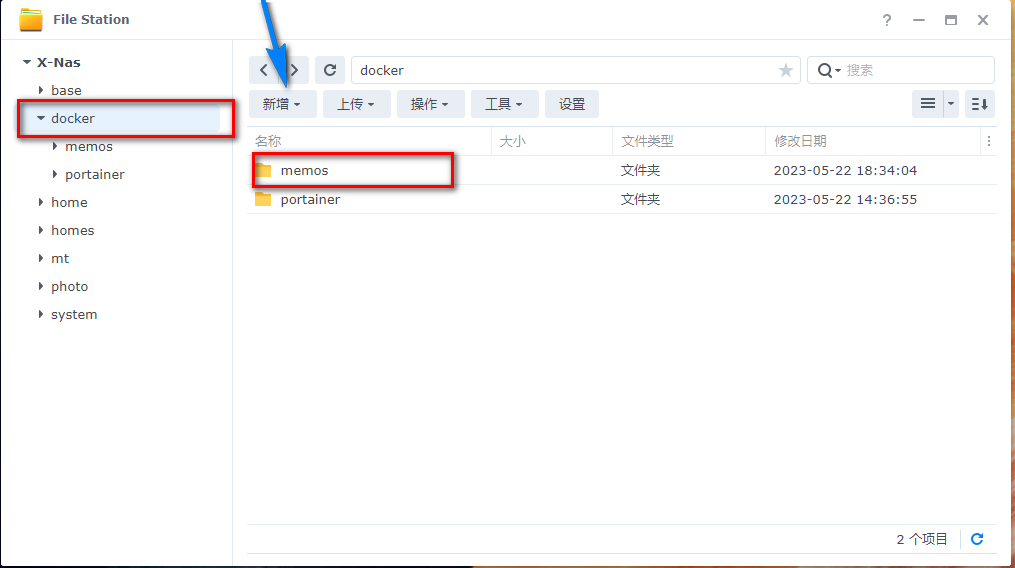
Create a Directory
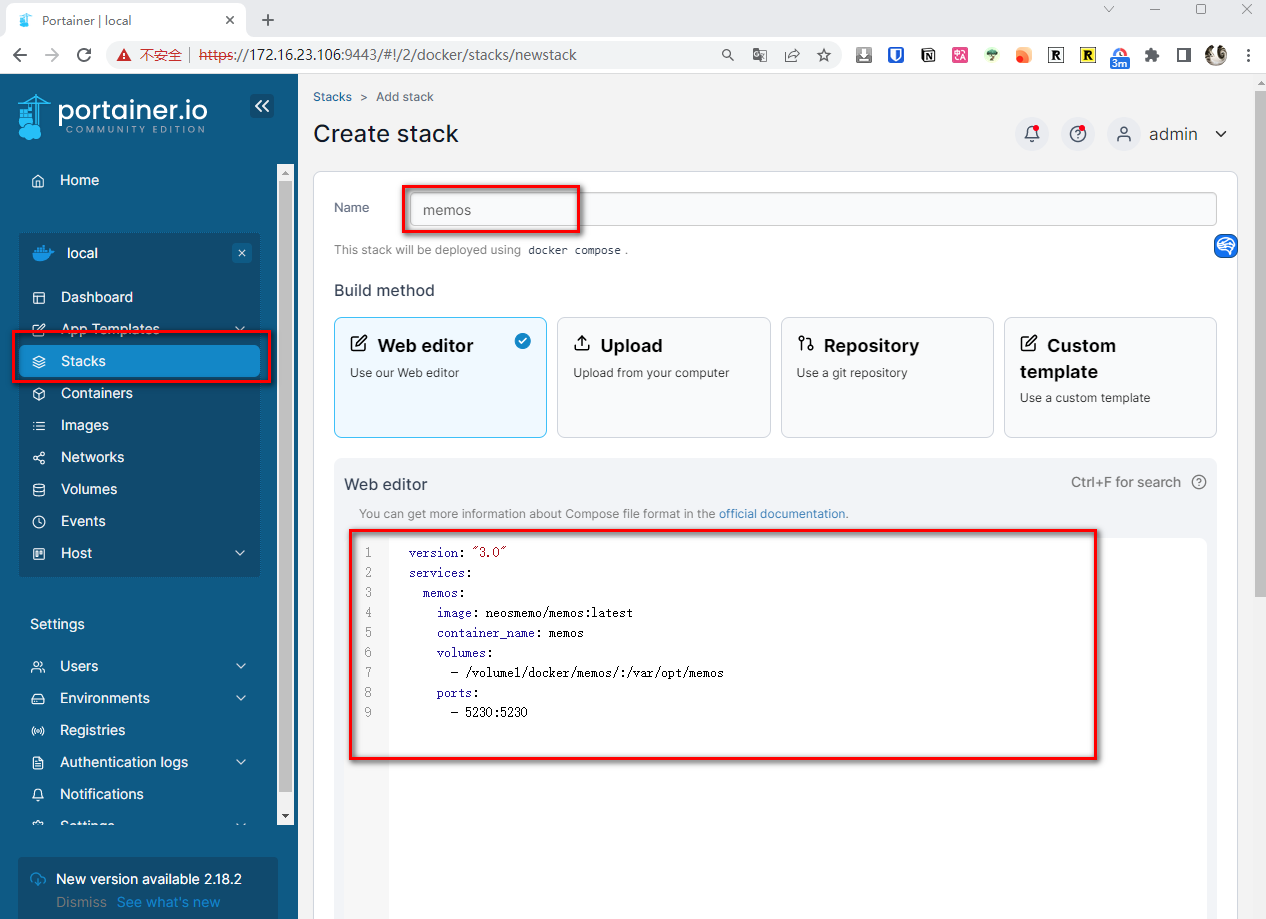
Create a Stack
| |
💕Done!
In the future, this channel will share many interesting and fun private services in Nas, all taught simply using Portainer.
Next, let’s get to the point of “how to build Portainer in Synology Nas”.
The whole process “does not require any code”, just use Synology’s “Task Scheduler”.
Introduction to Portainer
Portainer is a lightweight Docker container management tool.
Its advantages are:
- UI interface (easy operation)
- Easy deployment (more useful and fun services will be shared in the future)
- Multi-platform support (Synology, QNAP, Linux, Windows)
- Easy management (network, images, containers)
With it, we can easily build various services in Nas. In the future, I will also share various services I have built in Nas, and Portainer is indispensable here.
1. Key Point
Follow for free, never get lost.
2. Install Packages
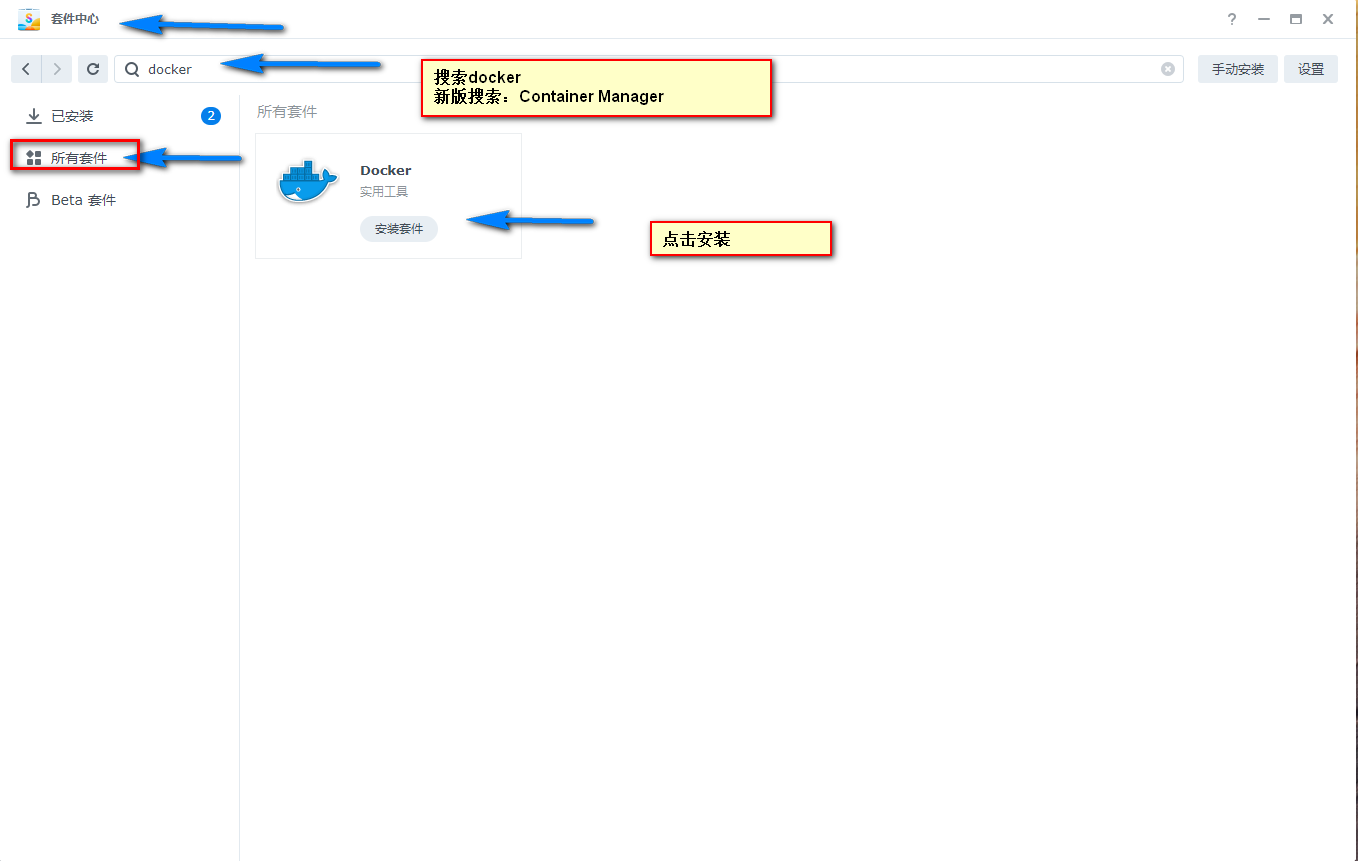
In Synology Package Center, search for:
- Docker (for Synology versions below 7.2)
- Container Manager (for Synology versions 7.2 and above)
3. File Station
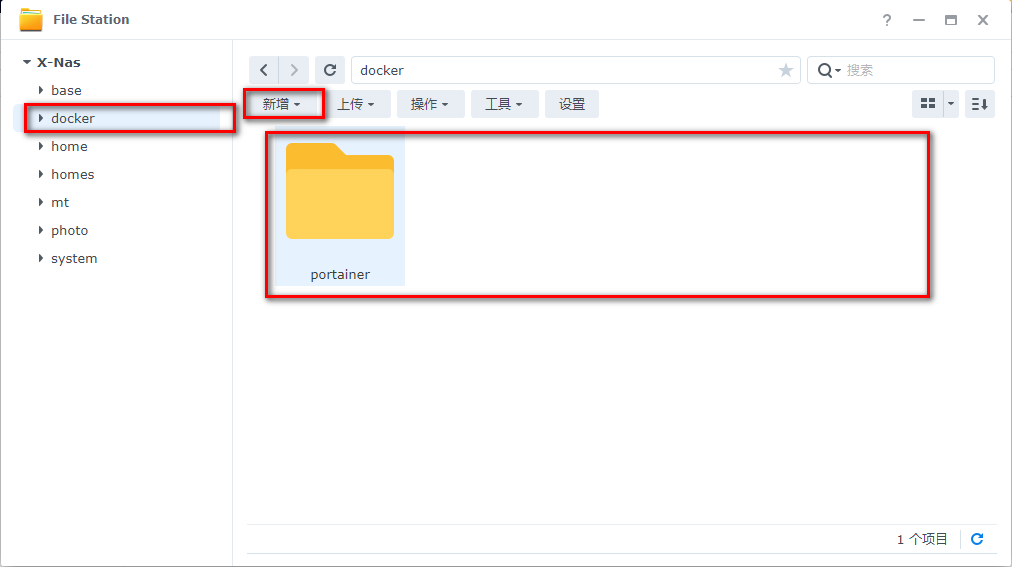
Open File Station, go to the “docker” folder, and create a “portainer” folder.
4. Task Scheduler
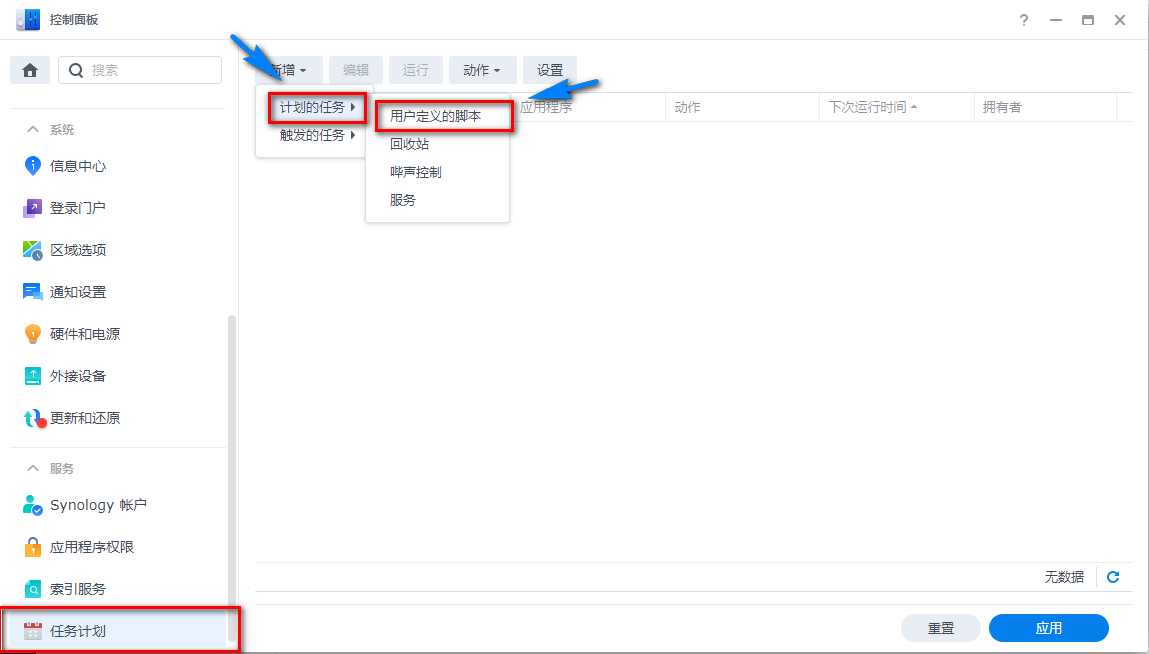
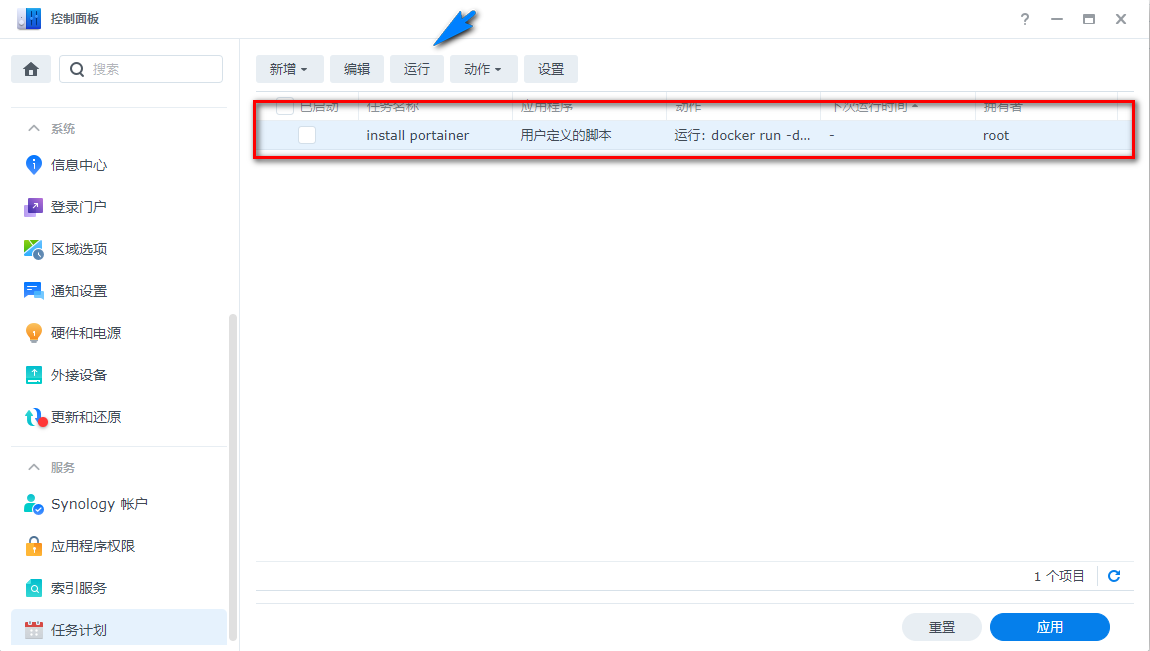
In Synology “Control Panel”, find “Task Scheduler”, click on “User-defined script” in “Scheduled Tasks”.
5. Installation
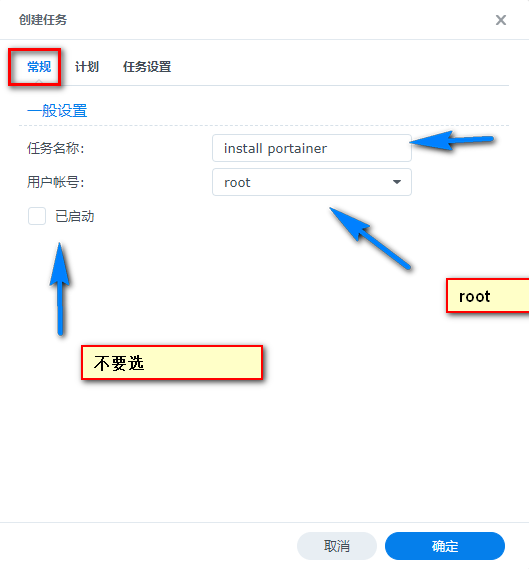
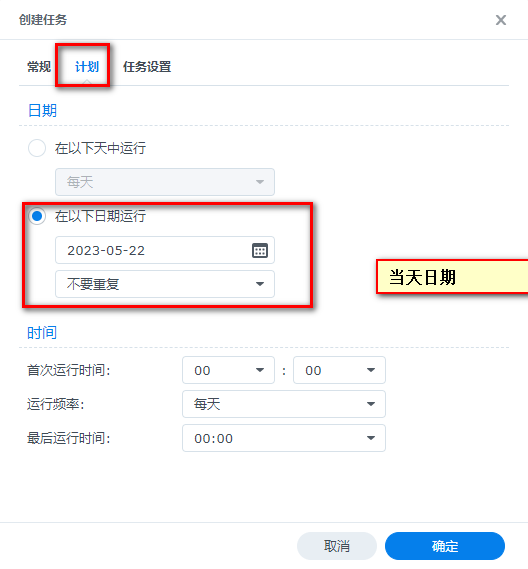
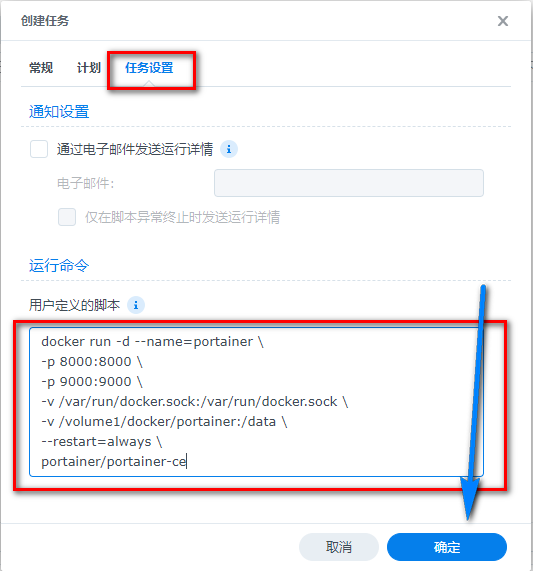
First, configure the settings: Schedule Settings -> Task Settings
Paste the code:
| |
6. Run the Script
Click on “Run”.
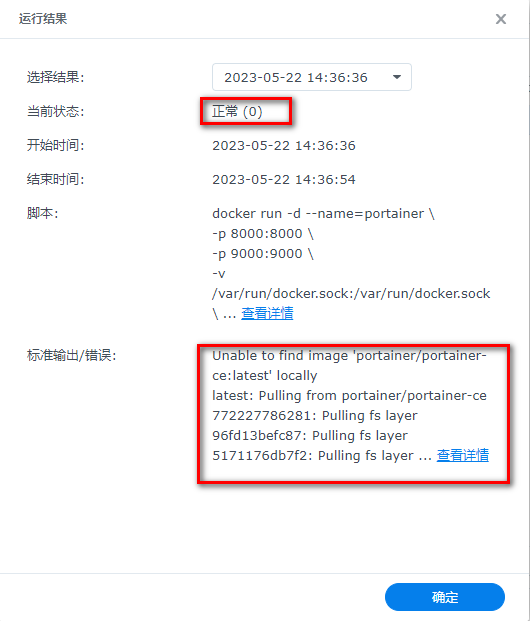
7. Check if it is completed (optional step)
Due to issues with the domestic network, there may be situations where the image cannot be pulled. Therefore, it is necessary to confirm. If it still doesn’t work, you can
set up a domestic source.
Two verification methods - choose one
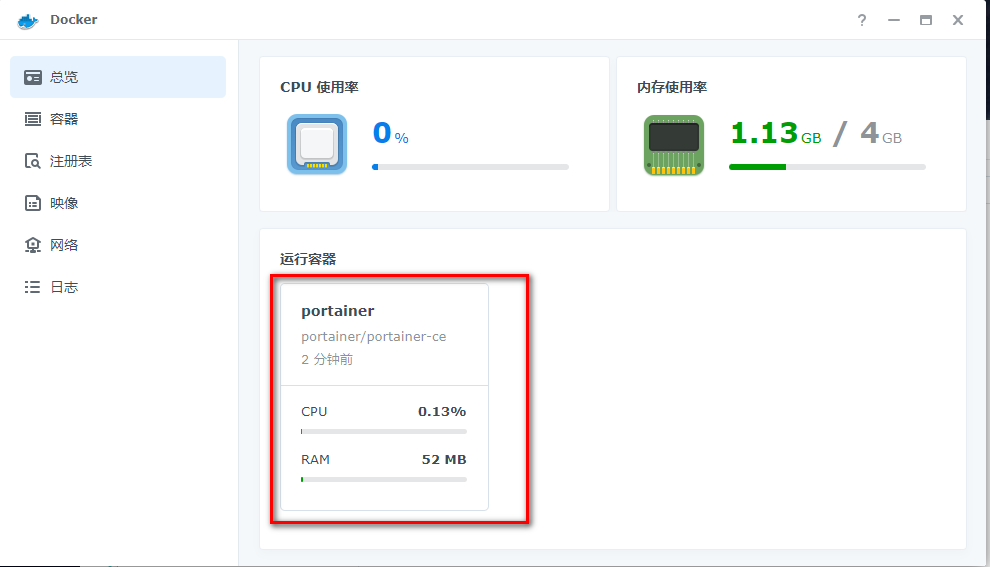
You can also check if Portainer has been successfully pulled in the docker suite
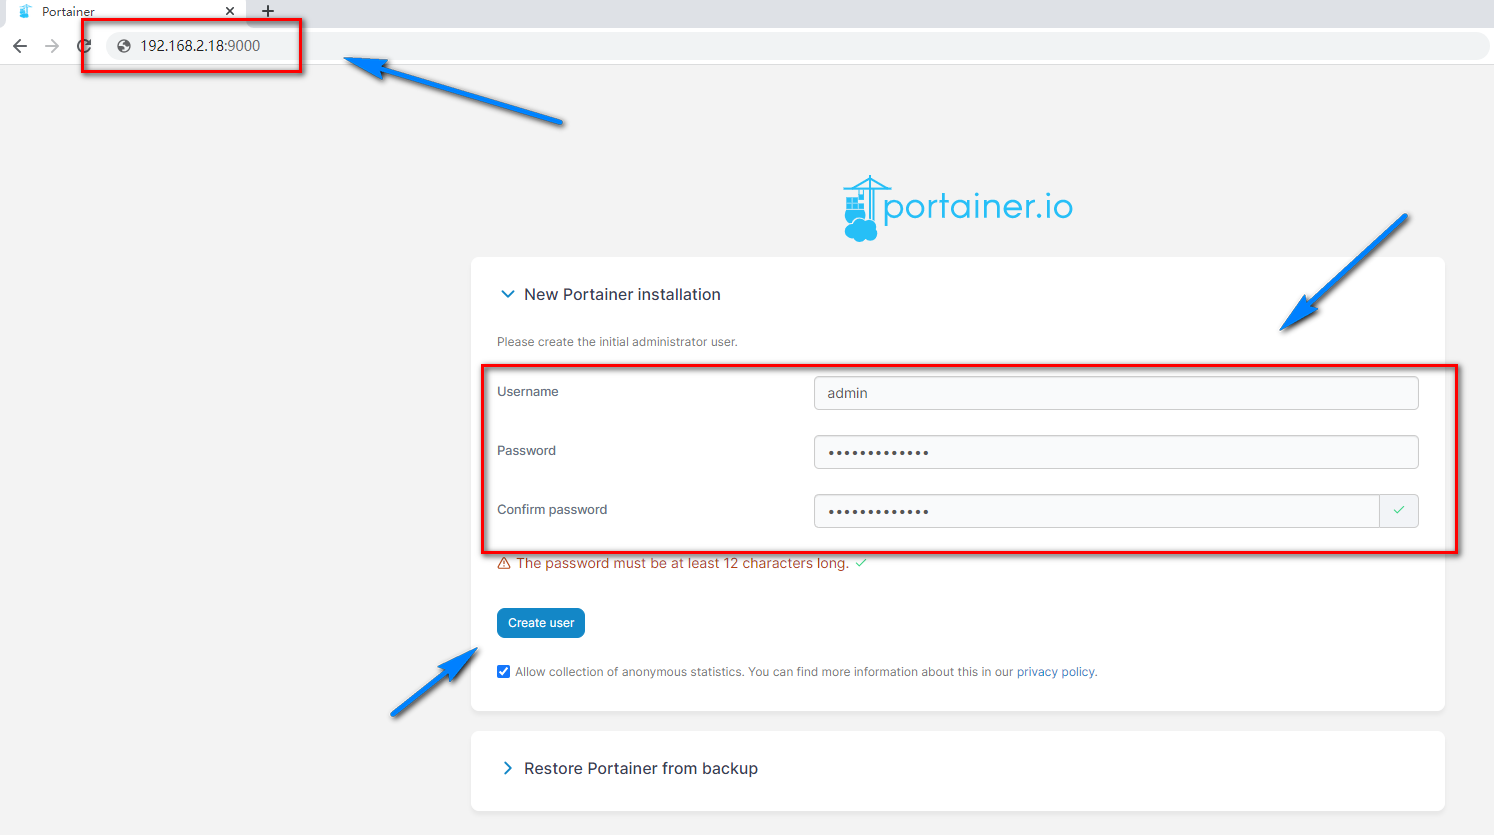
8. Enter Portainer
Set a password
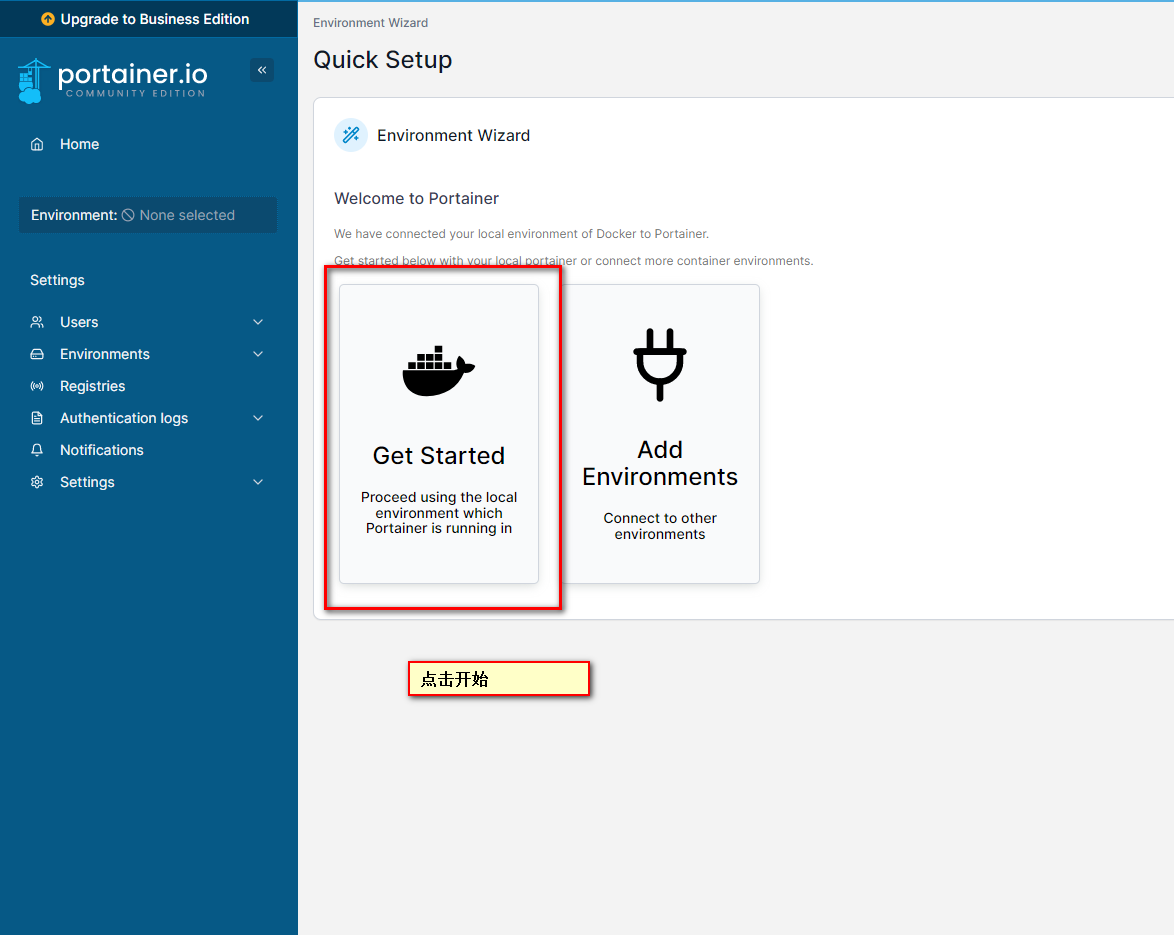
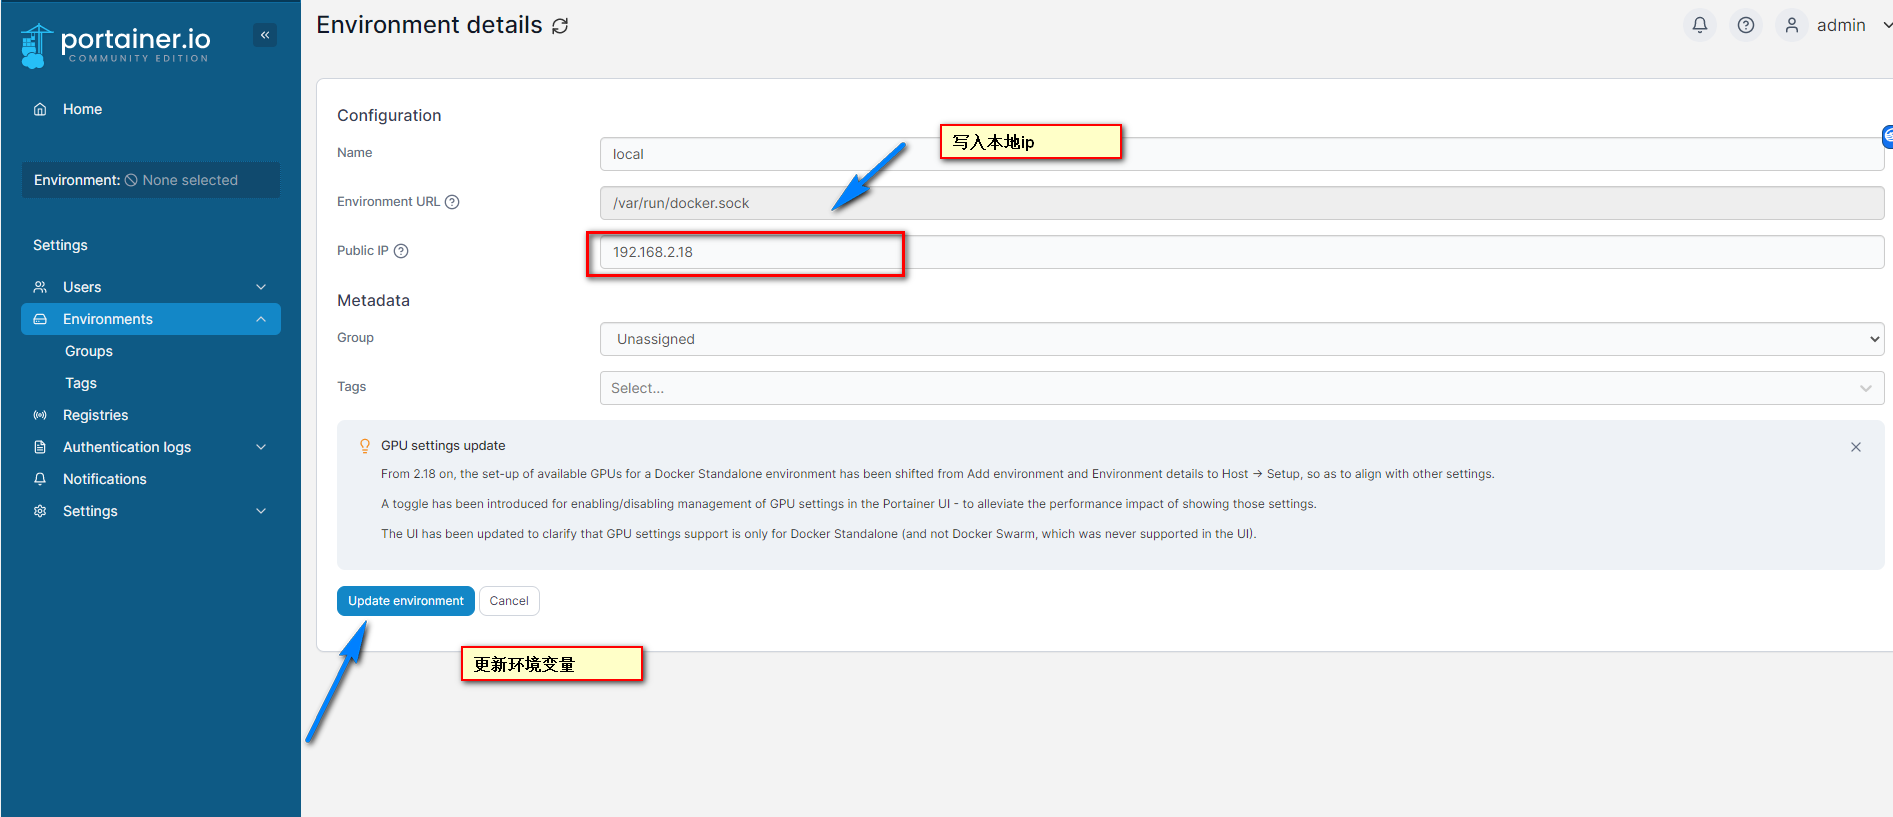
9. Settings
- Initialize environment variables
- Set the local IP in the environment variables for easy access (the local IP is the IP address of your local Synology NAS)
10. Block ads (optional)
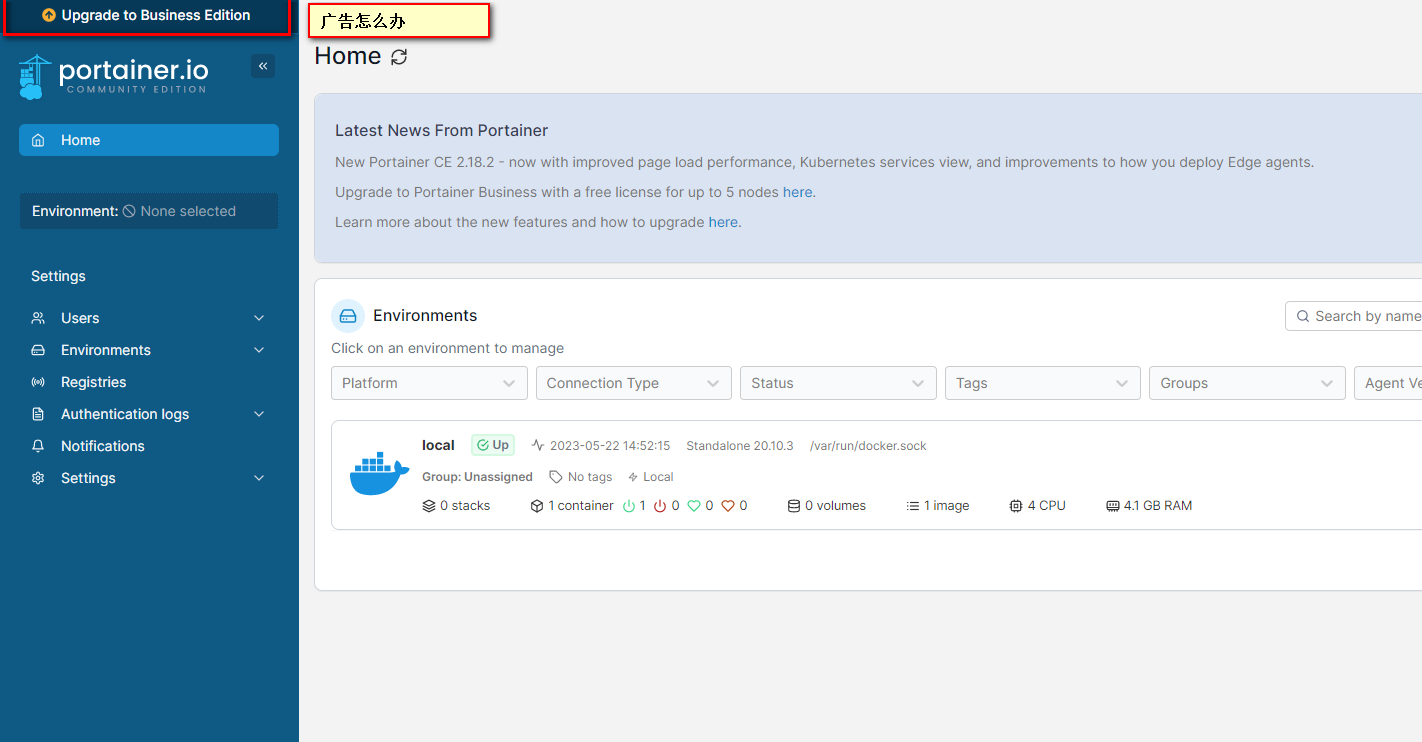
What to do with annoying Business upgrade reminders in Portainer?
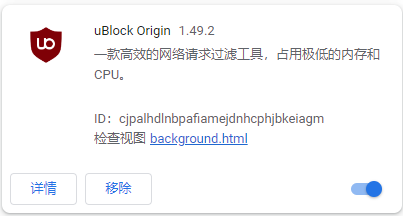
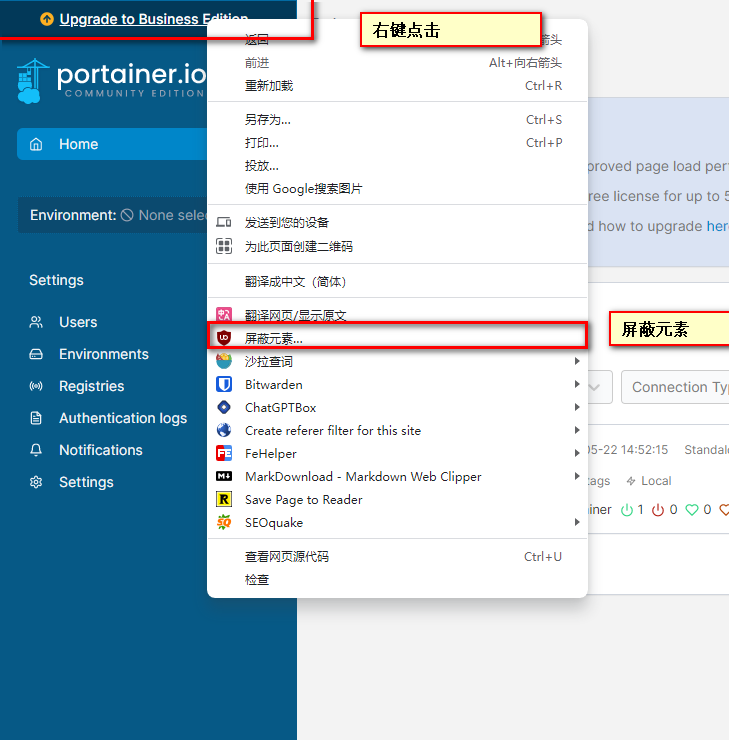
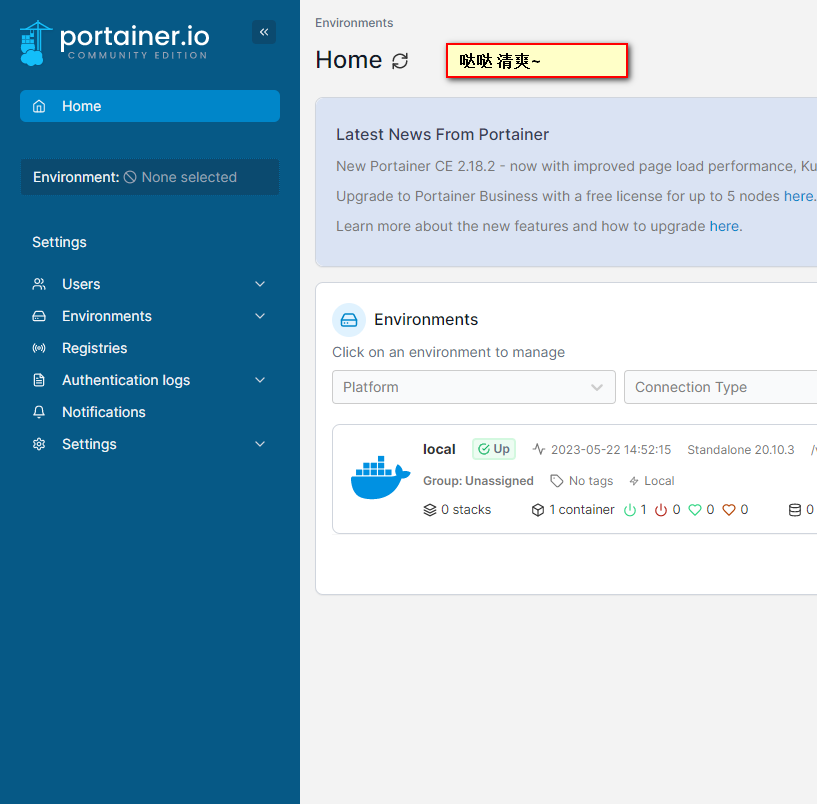
Use various browser ad blockers to block them
Congratulations, you have entered the brand new NAS world
Follow Daddy’s Digital Garden
Share interesting NAS toys and private cloud deployments.
如果你觉得这篇文章对你有所帮助,欢迎赞赏~
Sponsor
