
A New Tool for NAS Users: Create Personalized Resumes with Reactive-Resume to Boost Your Career Competitiveness
1. Introduction
A resume plays a crucial role in job hunting, applying for schools, or showcasing personal abilities.
Many working individuals may have experienced the frustration of working hard on a resume, only to be rejected by HR due to formatting or template issues.

So, how can you create a professional and appealing resume?
In today’s tutorial, I will help you build a service that allows you to easily create, update, and share your resume: Reactive-Resume.
Why do we need to build our own resume generator? There are two main reasons:
- It can meet your personalized resume needs, allowing you to freely adjust layouts, choose colors and templates, and even create resumes with dark mode.

- No ads, no user tracking, ensuring the integrity and privacy of your data to the greatest extent.
2. Reactive-Resume: Your Personalized Resume Generator
Reactive-Resume is an open-source online resume generator with the following main features:
- Free: Reactive-Resume is always free, with no ads or user tracking.
- Real-time Sync: You can sync your data across different devices without worrying about data loss.
- Data Import: You can import data from LinkedIn or JSON resumes, greatly simplifying the resume creation process.
- Resume Management: With just one account, you can manage multiple resumes.
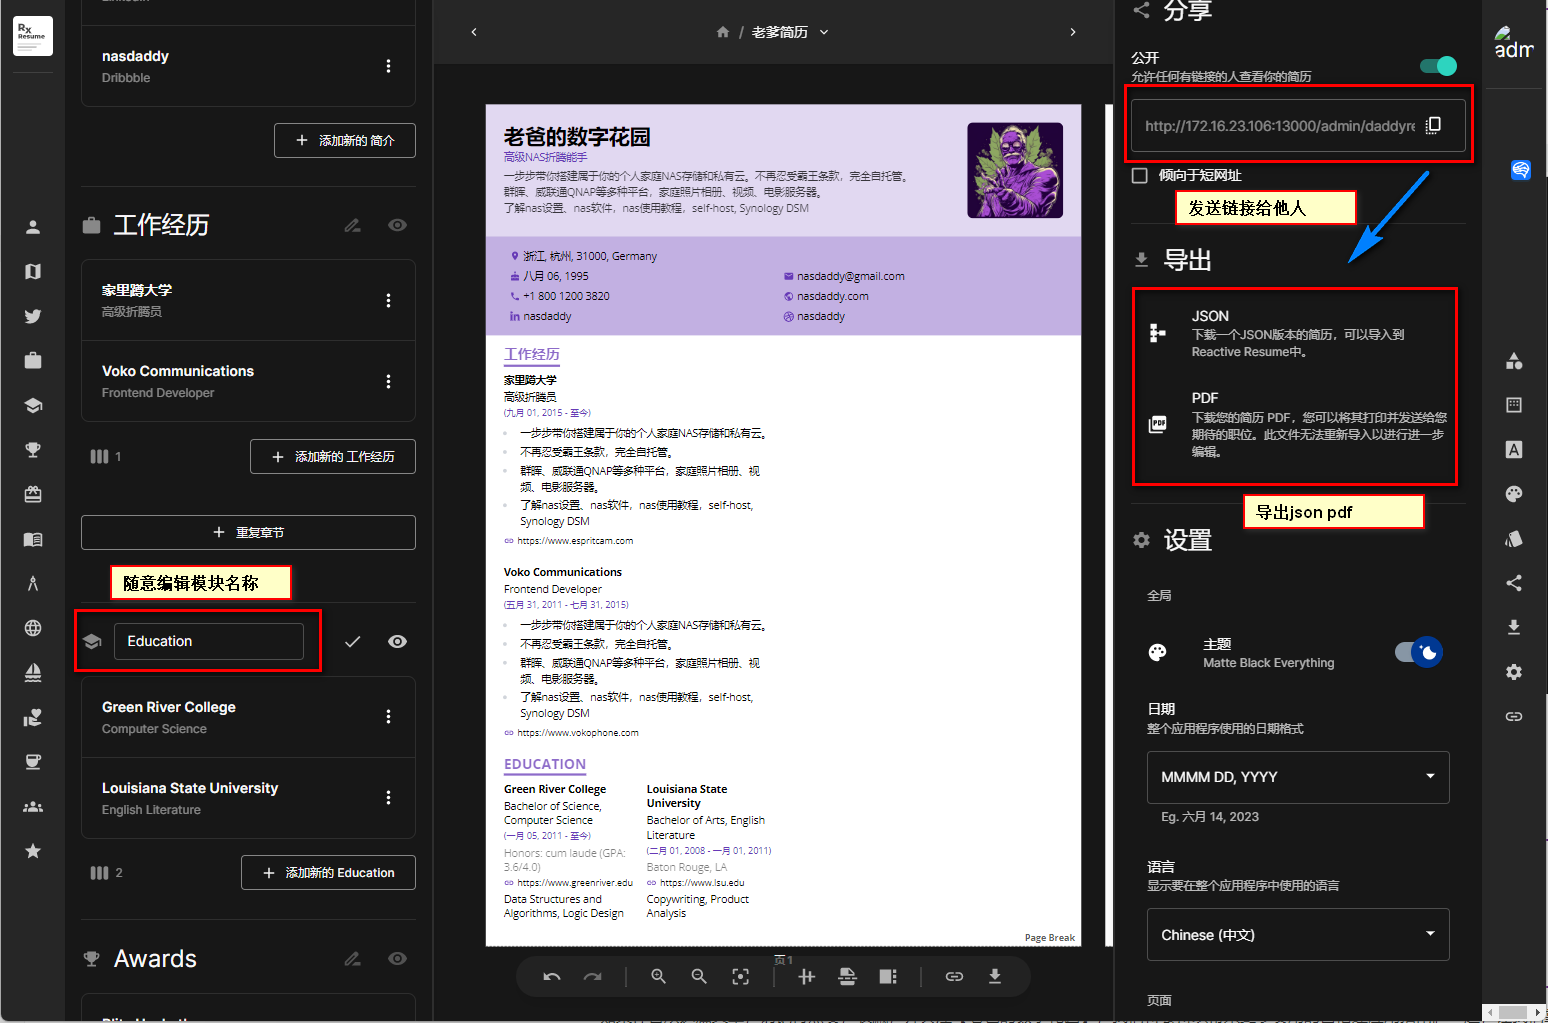
- Share Resumes: You can share your resume with others through a unique link or export it as a PDF.
- Customize Resumes: You can choose any font from Google Fonts and select various templates and colors, including dark mode.
Reactive-Resume is a powerful and user-friendly tool that makes resume creation, updating, and sharing simple and easy.
Now let’s move on to the steps to build it:
1. Key Point
Follow for free to avoid getting lost.
2. Install Portainer
Tutorial reference: 30-Second Installation of Portainer, a Must-Have Tool for NAS
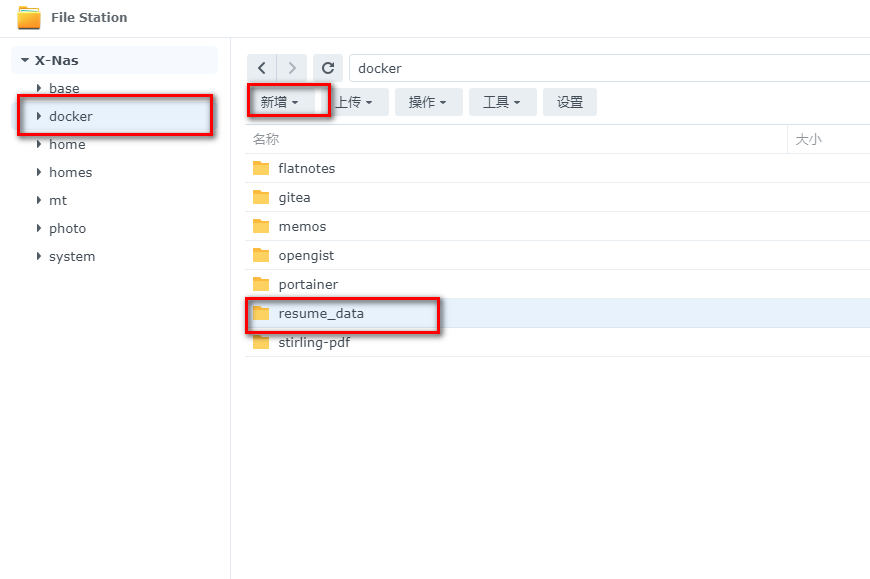
3. File Station
Open File Station and create a resume_data folder in the Docker folder.
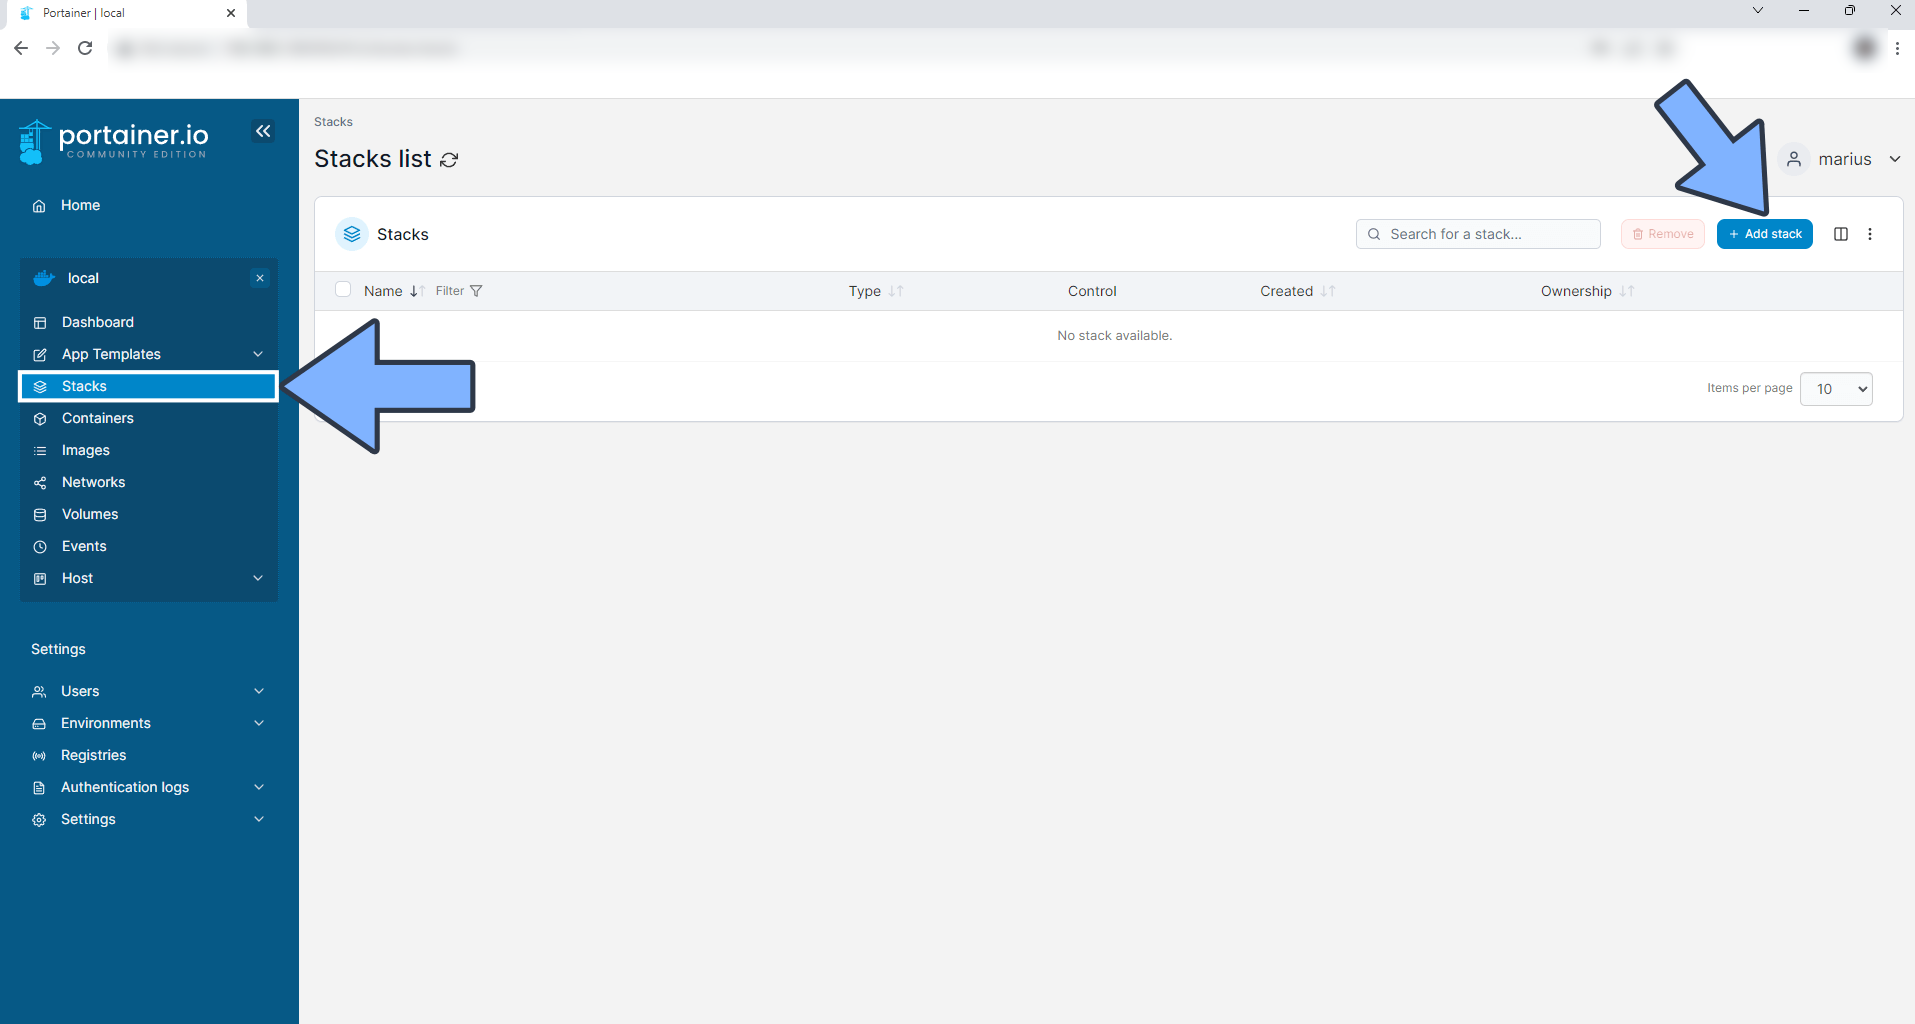
4. Create Stack
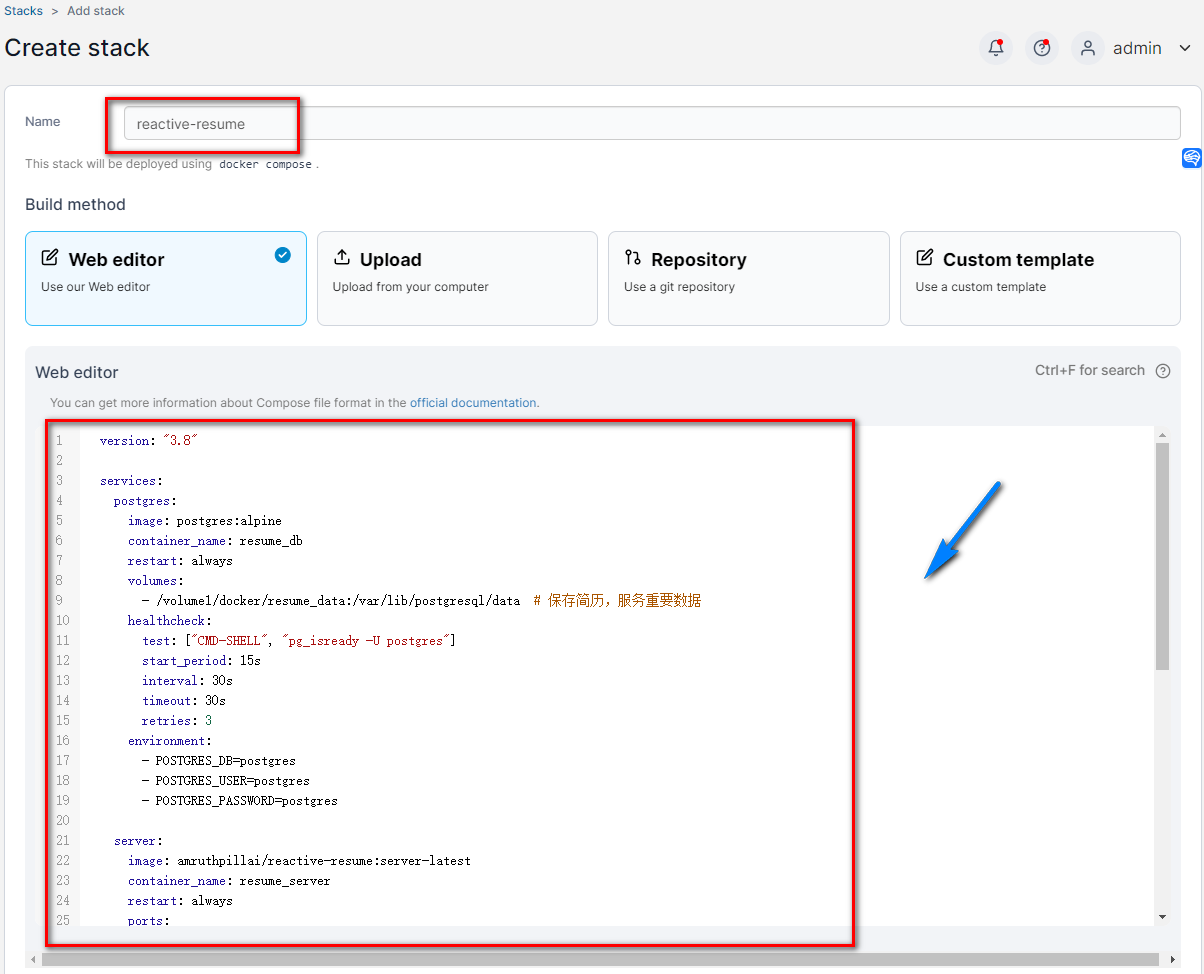
5. Deployment
| |
| |
- Select stack
- Enter “reactive-resume” in the name field
- Enter the above code in the editor
- Click deploy
Note: Replace PUBLIC_URL and PUBLIC_SERVER_URL with your internal IP address, such as 192.168.1.32:13000, or domain name (public)
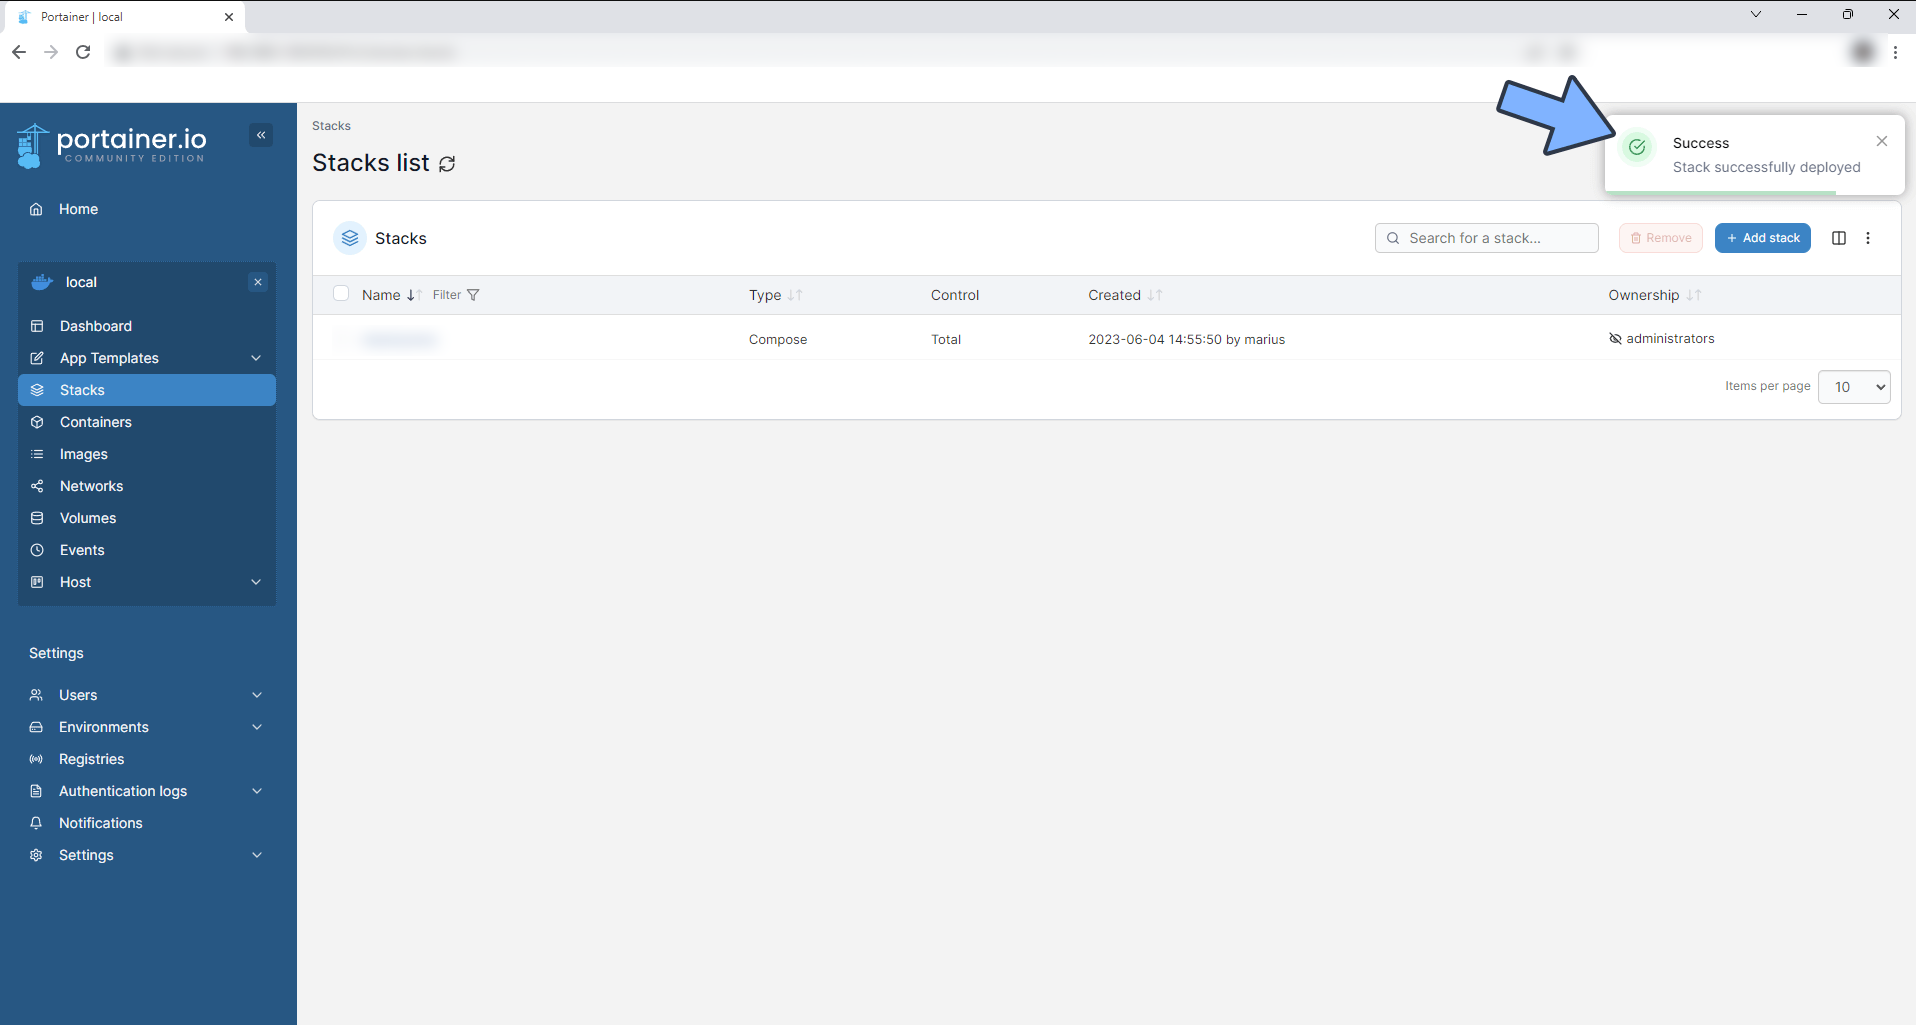
6. Success
7. Usage
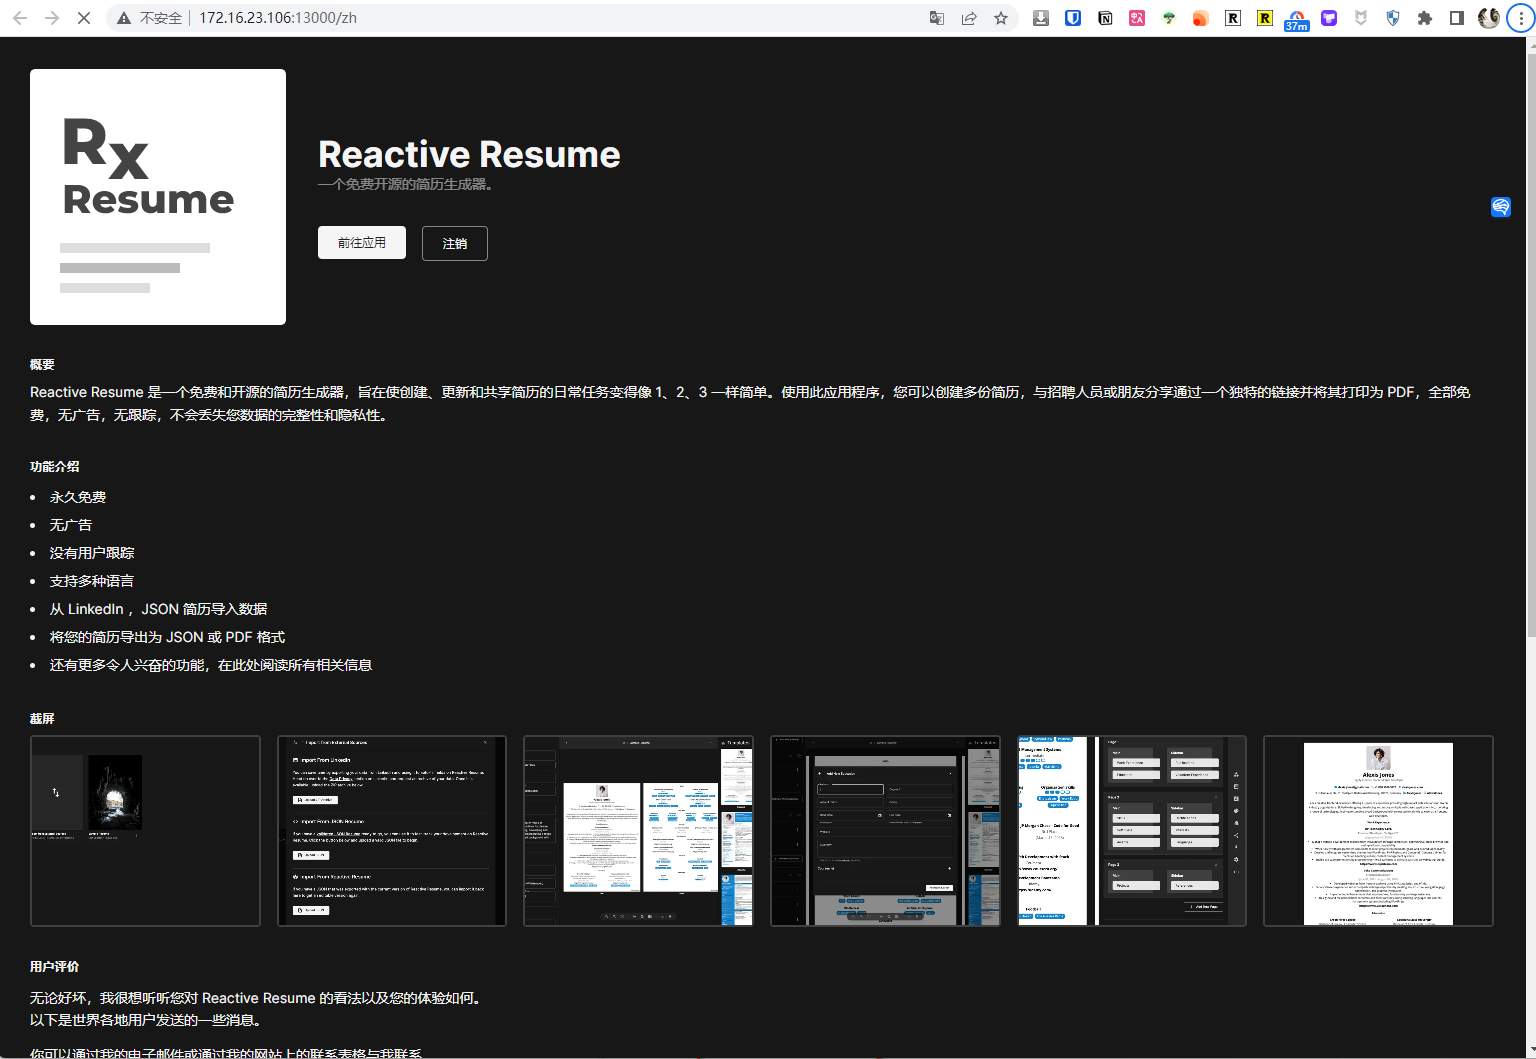
Open the program in your browser: [ip]:[port]
Replace ip with the IP address of your NAS (in this case, mine is 172.16.23.106), and port with the one defined in the configuration file (if you followed my tutorial, it would be 13000)
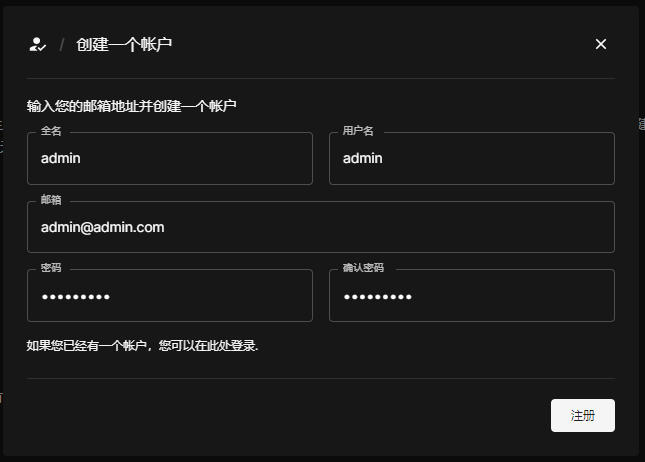
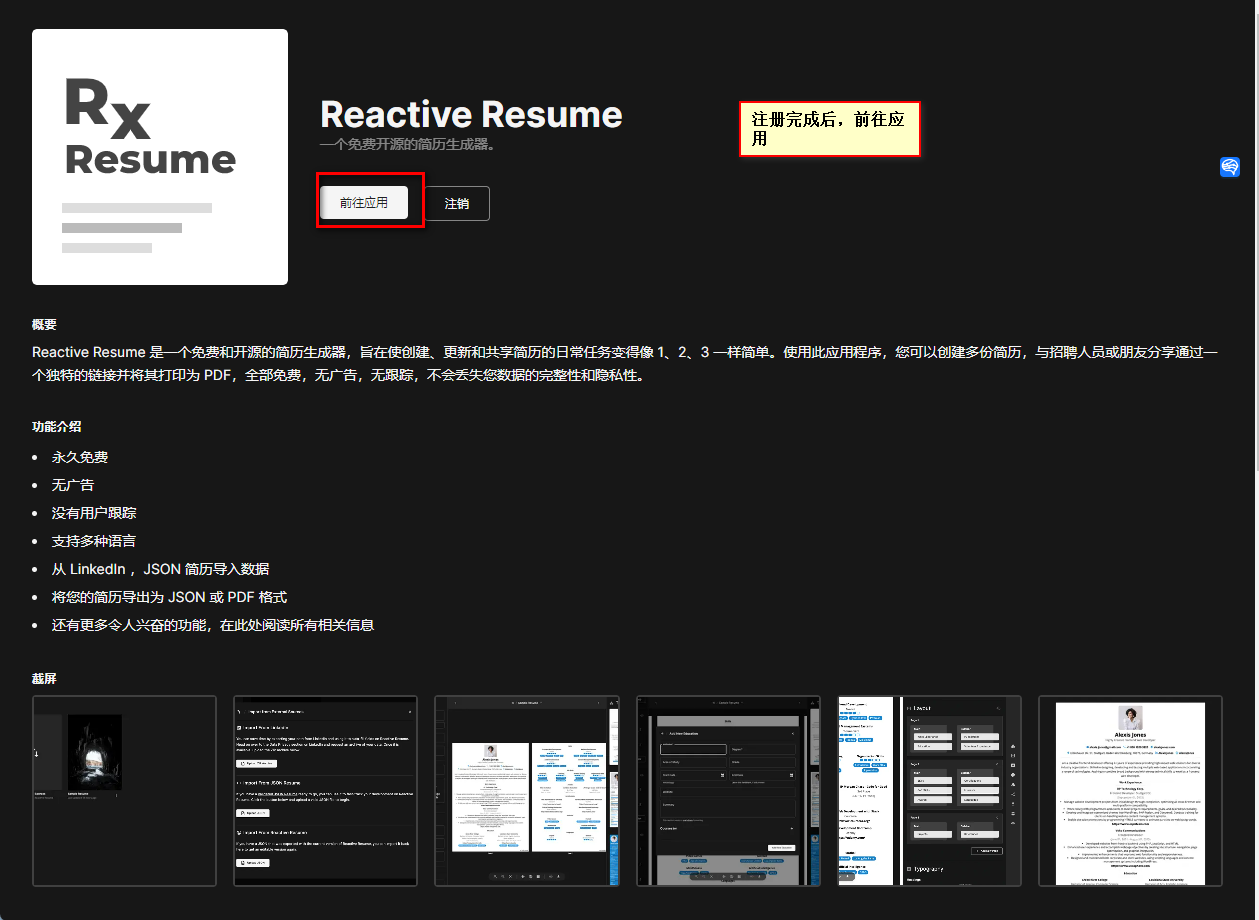
8. Register
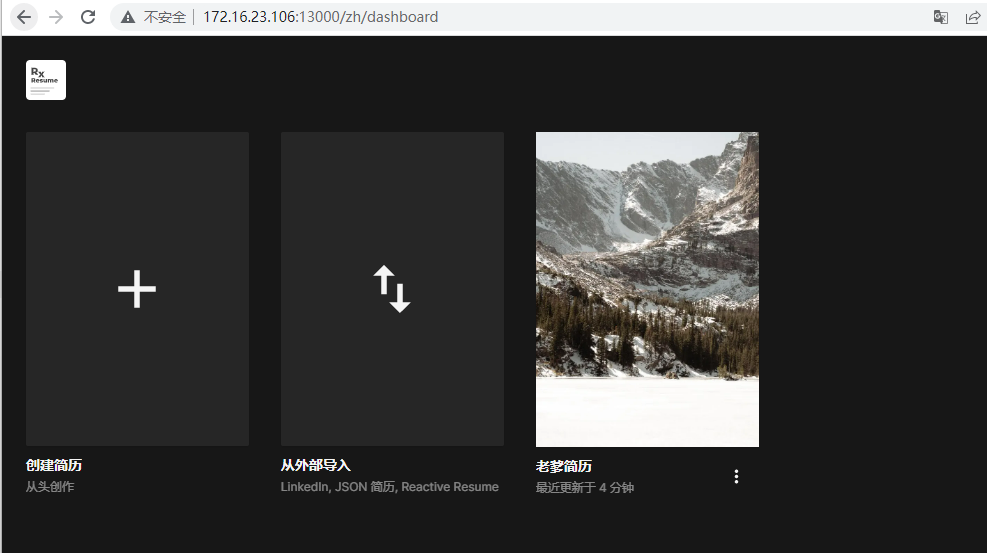
9. Create Resume
Two ways:
- Import from JSON
- Create new
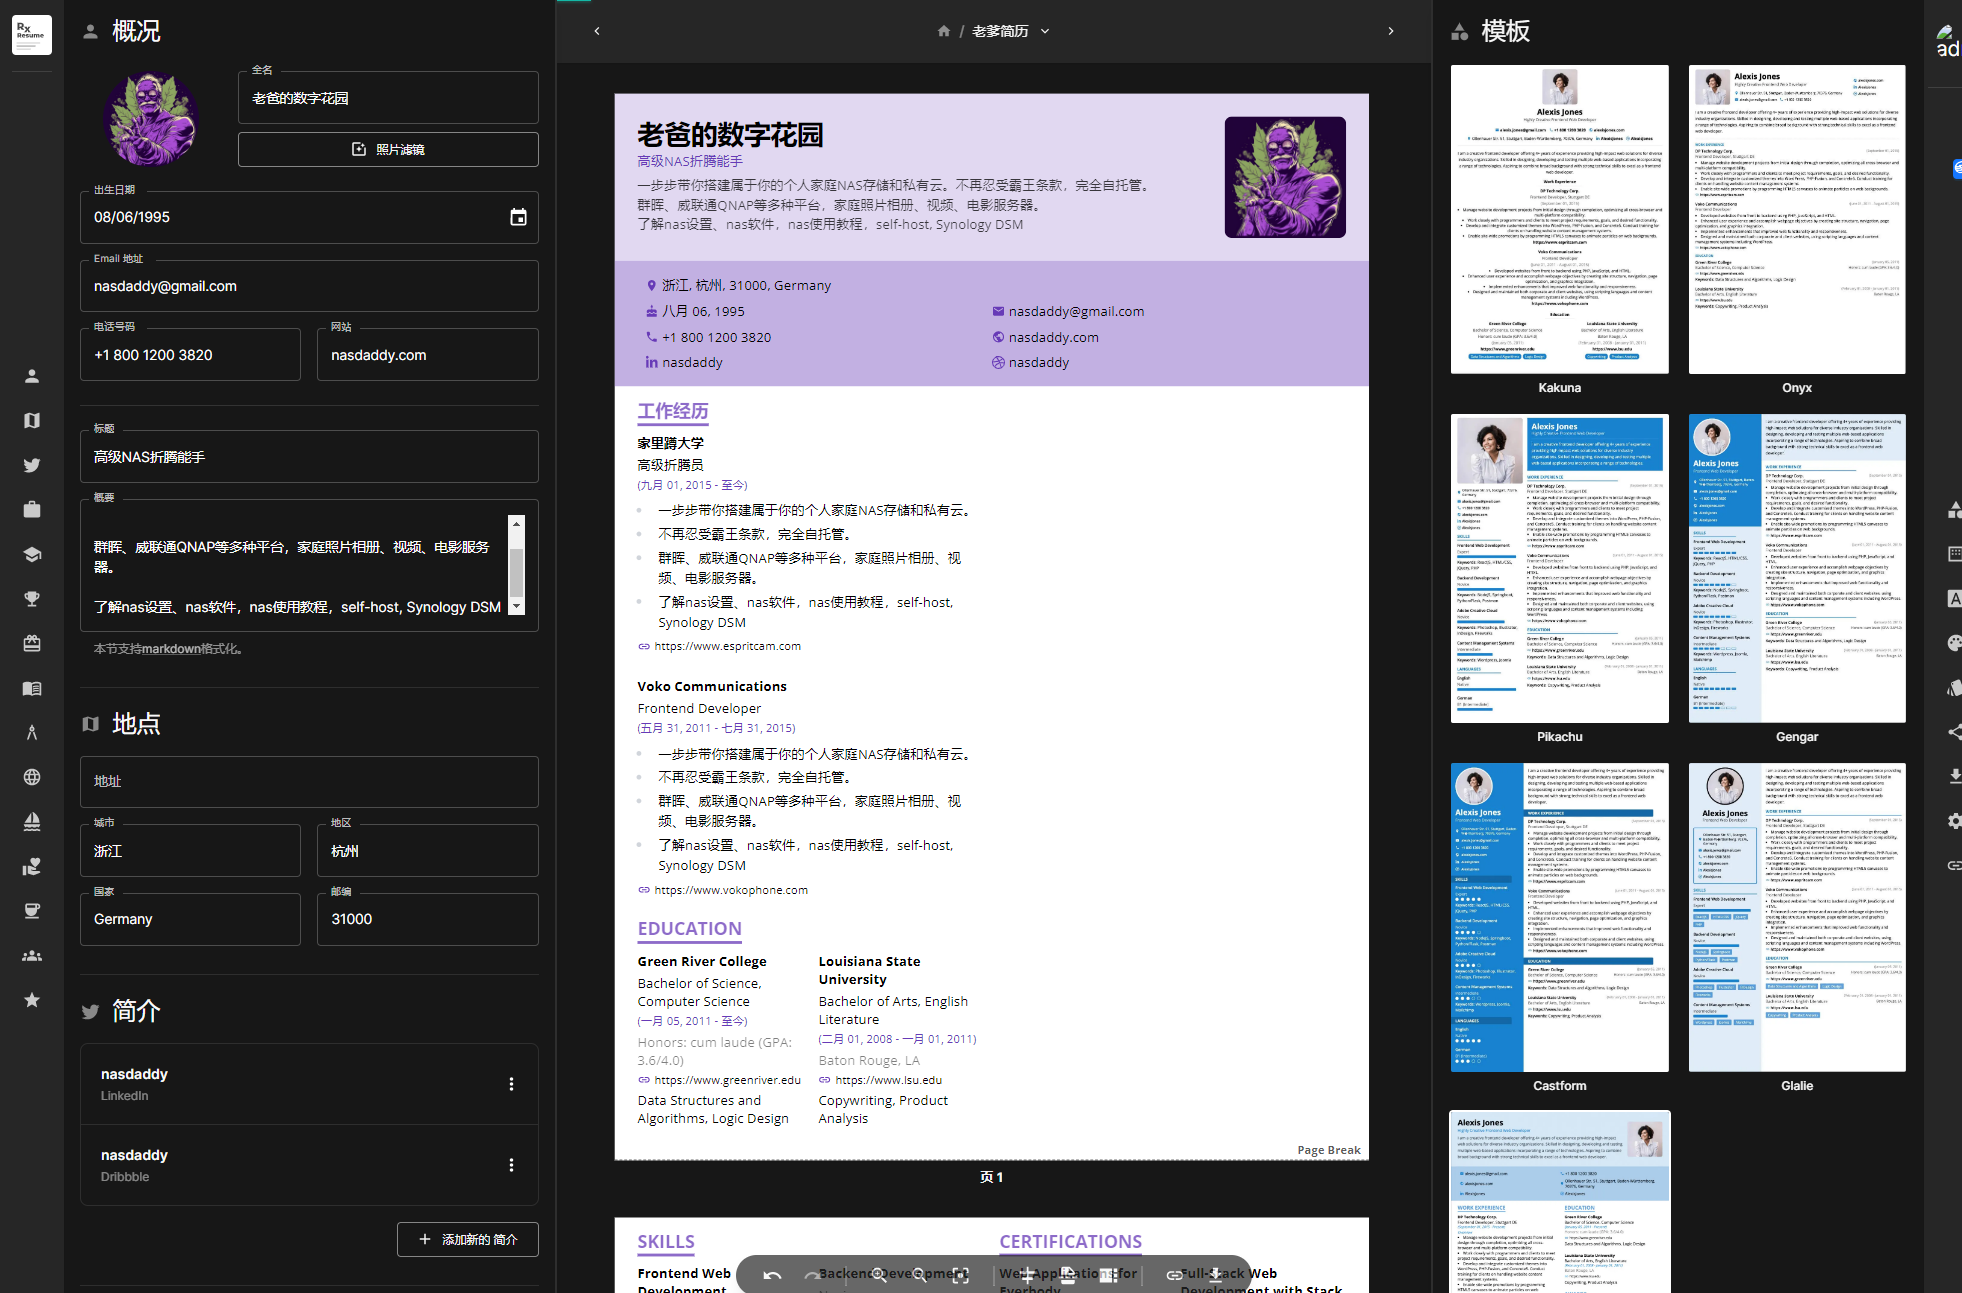
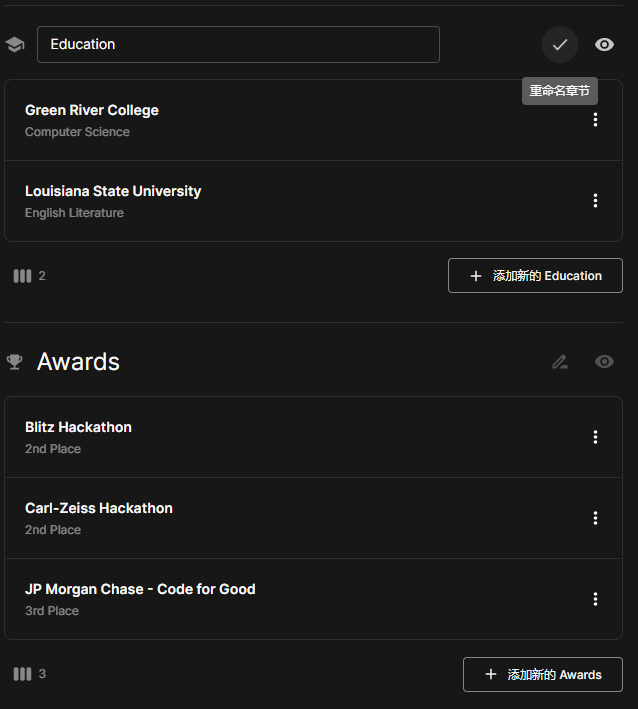
10. Edit Resume
Edit freely, change module names:
Export and Share
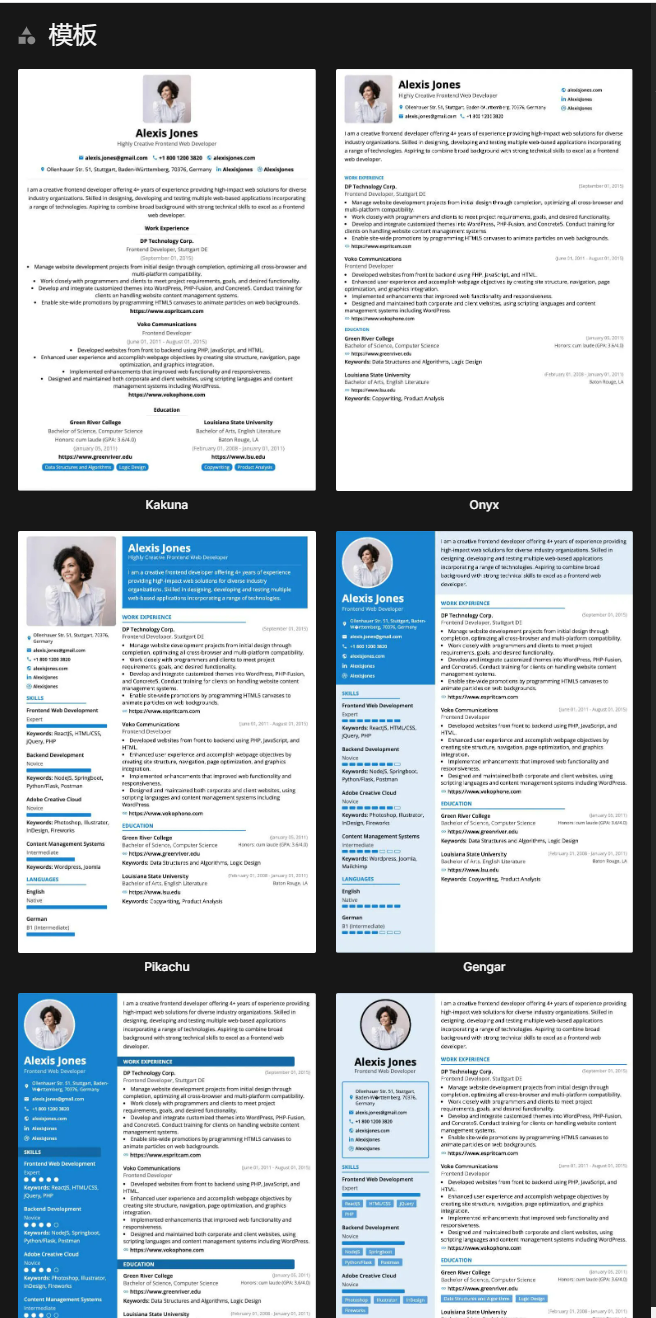
Change layout and DIY
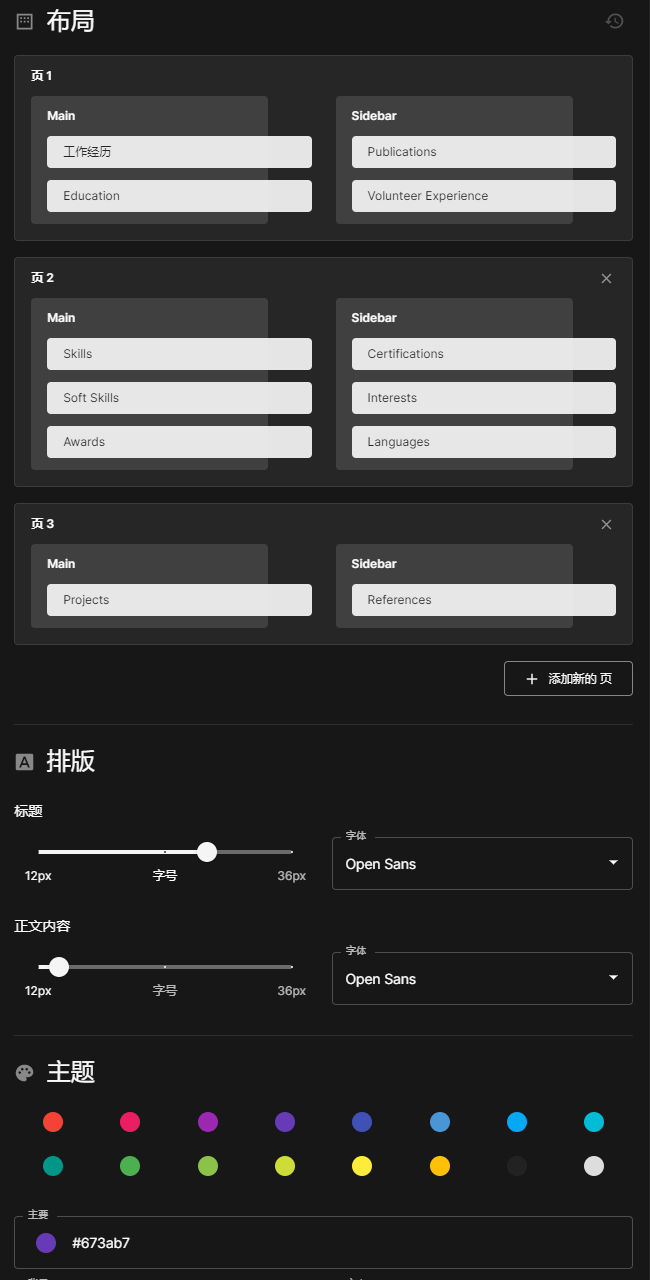
Multiple templates to choose from
Finally
Reactive-Resume will be your helpful assistant, helping you stand out among many applicants.
You can share it with your family, even your wife. I believe this time, your wife will agree to let you buy that NAS you’ve been longing for 😂
If you like this article, please remember to like, bookmark, and follow “Dad’s Digital Garden”. We will continue to bring you more practical self-hosted application guides. Together, let’s take control of our own data and create our own digital world!
If you encounter any problems during the setup process or have any suggestions, feel free to leave a comment below for discussion and learning.
如果你觉得这篇文章对你有所帮助,欢迎赞赏~
Sponsor